 Save
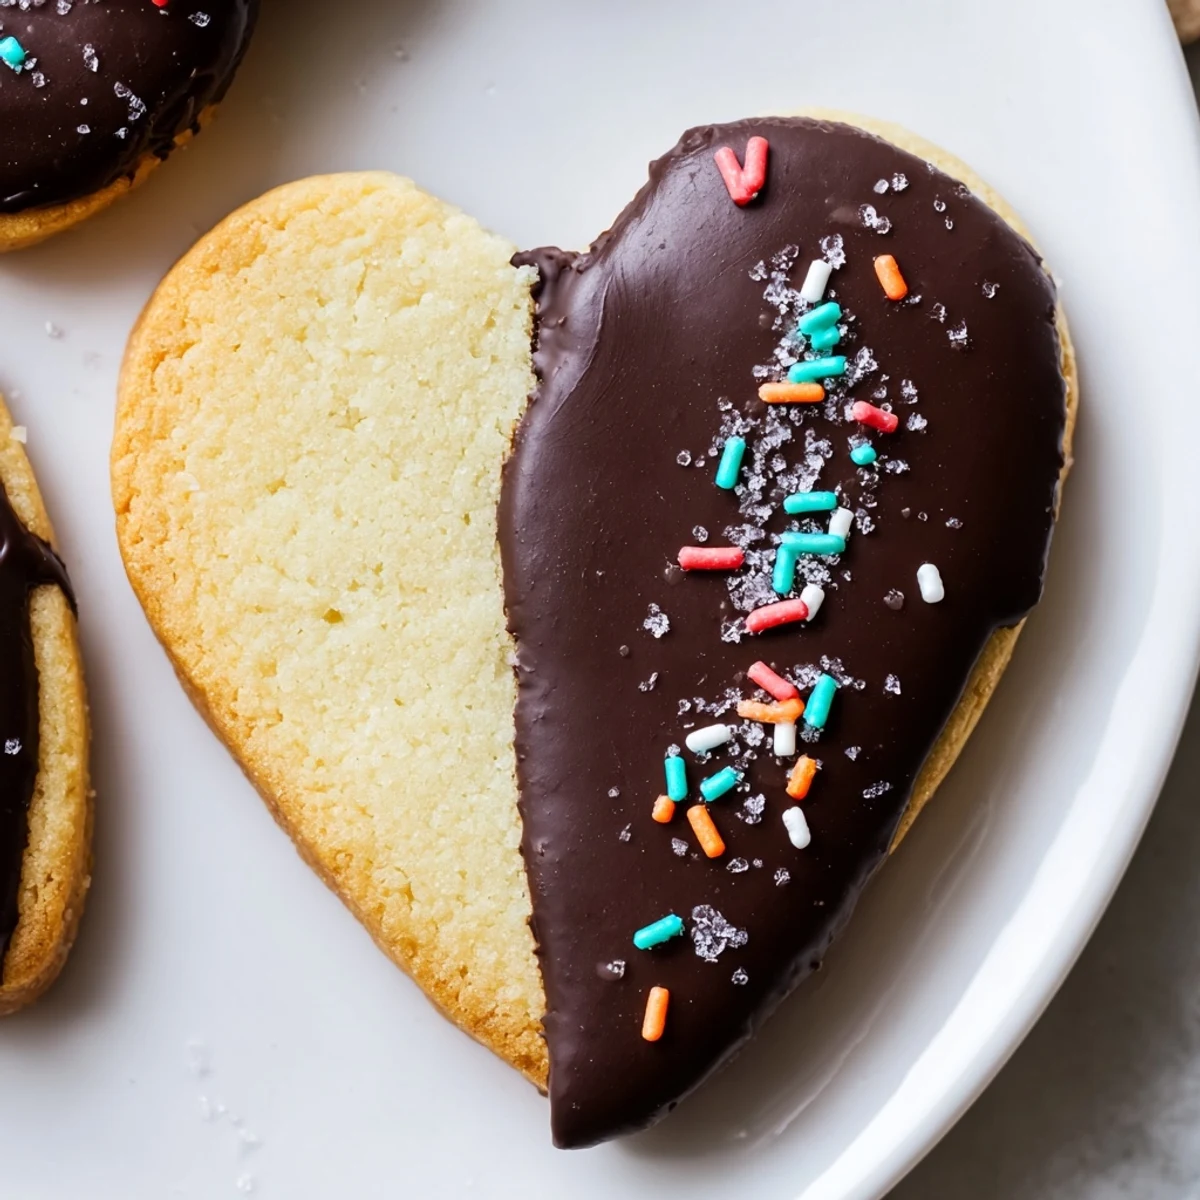
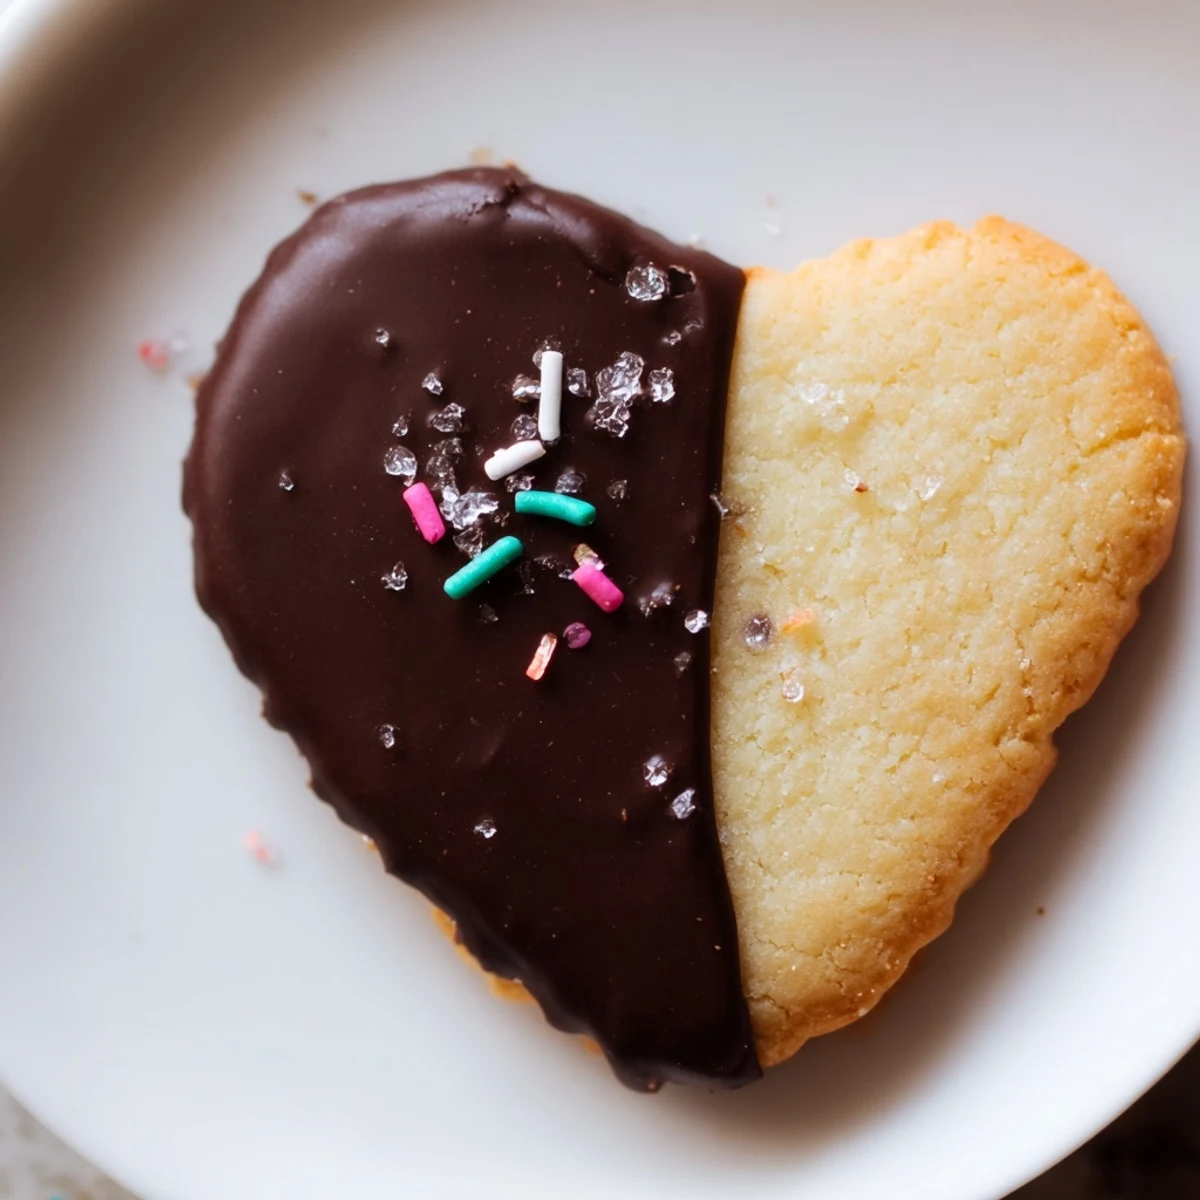
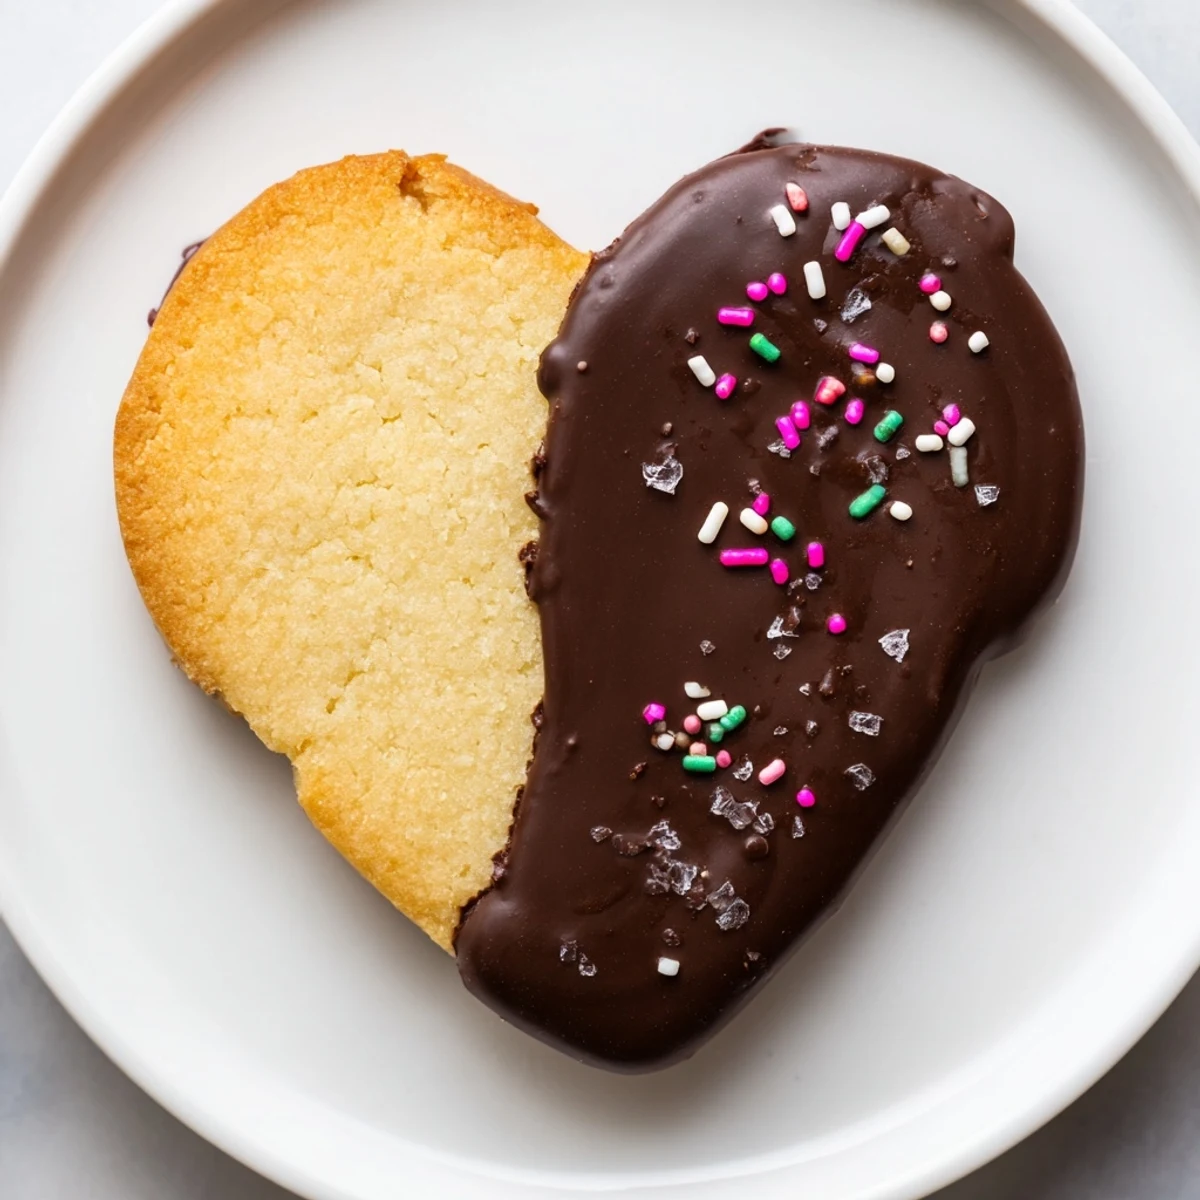
Save These delightful heart-shaped shortbread cookies are a buttery, tender confection, perfect for celebrating any special occasion or simply enjoying with your favorite warm beverage. Preparing them involves creaming softened butter with powdered sugar and vanilla, then folding in flour to create a pliable dough. After chilling, the dough is rolled and cut into charming heart shapes, then baked until lightly golden. The real magic happens when these cooled biscuits are partially dipped in decadent melted dark chocolate, often enhanced with a touch of coconut oil for a silky finish. A sprinkle of sea salt or festive decorations can be added while the chocolate is still wet, creating an irresistible visual and taste experience. Allow them to set fully for a firm, delicious treat that keeps well.
The scent of baking shortbread always brings me back to quiet Sunday afternoons, the kitchen warm and sun-drenched. There's something so comforting about the simplicity of butter, sugar, and flour transforming into something truly special. These Chocolate Dipped Shortbread Hearts quickly became a beloved ritual in my home. They’re a little bit of indulgence that feels both fancy and entirely achievable.
I recall a chilly autumn afternoon when I first brought a platter of these to a friend's small tea gathering. The little hearts, glistening with chocolate and a sprinkle of sea salt, were devoured almost instantly. There was a murmur of appreciation around the table, and everyone asked for the recipe, which truly warmed my heart. It was a lovely reminder that sometimes the simplest treats are the most cherished.
Ingredients
- Unsalted butter: Your foundation for flavor; ensure it's softened to room temperature for that perfect creamy start.
- Powdered sugar: Gives the shortbread its signature delicate texture, dissolving beautifully into the butter.
- Vanilla extract: A touch of warmth and fragrance, essential for enhancing the buttery notes.
- All-purpose flour: Measure it correctly (scoop and level) to avoid dense cookies; it's the structure of your perfect bite.
- Fine sea salt: Crucial for balancing the sweetness and brightening all the other flavors in the dough.
- Dark chocolate, chopped: Go for quality here; a good dark chocolate makes all the difference in the dipping.
- Coconut oil (optional): Just a tiny bit makes your melted chocolate incredibly smooth and easy to work with, plus it gives a lovely sheen.
- Sprinkles, sea salt flakes, or crushed freeze-dried raspberries: These are your finishing touches, adding visual appeal and delightful little pops of texture or tartness.
Instructions
- Prepping Your Baking Haven:
- Set your oven to 350°F (175°C) and line two baking sheets with parchment paper; this ensures easy cleanup and no sticking.
- Creaming the Dreamy Base:
- In a large bowl, beat the softened butter and powdered sugar until they're light, fluffy, and almost ethereal; mix in the vanilla until fragrant.
- Folding in the Dry Delights:
- Gently add the flour and salt, mixing just until a soft, cohesive dough forms; be careful not to overmix, as that can lead to tough cookies.
- Rolling Out the Love:
- On a lightly floured surface, roll the dough to about 1/4 inch (6 mm) thick; aim for evenness so all your hearts bake uniformly.
- Cutting Out the Hearts:
- Use your favorite heart-shaped cookie cutter to create lovely shapes, placing them about an inch apart on your prepared sheets.
- Chilling for Perfection:
- Pop the baking sheets into the refrigerator for 10 minutes; this quick chill helps the cookies keep their beautiful shape in the oven.
- Baking Until Golden:
- Bake for 12–15 minutes, watching for the edges to turn a delicate golden brown; they should be firm but still pale in the center.
- Cooling Down:
- Let them cool completely on a wire rack; patience here is key before they meet their chocolatey destiny.
- Melting the Magic:
- Gently melt the dark chocolate (and coconut oil, if using) in a microwave or a double boiler until it's silky smooth and glossy.
- Dipping into Decadence:
- Carefully dip half of each cooled cookie into the melted chocolate, letting any excess drip off gracefully. Place them back on parchment paper.
- Adorning with Sparkle:
- While the chocolate is still glistening and wet, sprinkle your chosen decorations — sea salt, sprinkles, or crushed raspberries — for that extra flair.
- Setting the Stage:
- Allow the chocolate to set completely at room temperature or in the refrigerator before gathering your loved ones to enjoy these delightful treats.
 Save
Save One winter evening, after a particularly long and gloomy day, I decided to bake these on a whim. The simple act of creaming butter and sugar, then rolling out the dough, was incredibly therapeutic. As the chocolate set, I sat with a warm cup of tea and nibbled on a fresh heart, and suddenly, the day didn't feel so heavy. They weren't just cookies; they were a little hug, a quiet moment of peace.
A Little Flour Power Perspective
When rolling out the dough, use just a whisper of flour on your surface and rolling pin. Too much flour can make the shortbread tough and dry, altering that signature melt-in-your-mouth quality we're aiming for. It’s a delicate balance that comes with a little practice.
The Art of the Perfect Dip
Getting that perfect chocolate coating can feel tricky at first. I've found that having the melted chocolate in a slightly deeper, narrower bowl makes dipping much easier, as you can fully immerse half the cookie without getting chocolate all over your fingers. Also, let the excess drip off naturally before placing it down; patience makes for a prettier finish.
Storing Your Sweet Creations
These shortbread hearts hold up beautifully, making them perfect for gifting or enjoying throughout the week. Storing them correctly will preserve their delicate texture and chocolatey goodness.
- Always ensure the chocolate is completely set before stacking or storing.
- Keep them in an airtight container at room temperature; a cool, dry pantry is ideal.
- For best flavor and texture, enjoy them within a week.
 Save
Save These Chocolate Dipped Shortbread Hearts are more than just a treat; they're a small gesture of love, perfect for sharing or savoring solo. Enjoy the process, and may each bite bring a little joy to your day.
Your Questions Answered
- → How can I ensure my shortbread cookies are perfectly tender?
-
For tender shortbread, it's crucial not to overmix the dough once the flour is added. Cream the butter and sugar thoroughly until light and fluffy, then gently fold in the dry ingredients until just combined. Chilling the dough before baking also helps maintain its shape and texture.
- → Can I use different types of chocolate for dipping?
-
Absolutely! While dark chocolate offers a rich contrast, you can easily substitute it with milk chocolate for a sweeter profile or white chocolate for a creamier finish. Ensure you use good quality melting chocolate for the best results.
- → What is the best way to melt the chocolate for dipping?
-
You can melt the chocolate using a double boiler over simmering water or in a microwave. If using a microwave, heat in short 30-second bursts, stirring well after each, until smooth. Adding a teaspoon of coconut oil can create a smoother, more fluid chocolate for easier dipping.
- → How long do these cookies stay fresh, and how should they be stored?
-
These chocolate-dipped shortbread cookies can be stored in an airtight container at room temperature for up to one week. If you live in a warm climate, you might consider refrigerating them to prevent the chocolate from melting, though this can slightly alter the shortbread's texture.
- → Can I prepare the shortbread dough ahead of time?
-
Yes, the shortbread dough is excellent for making ahead. You can prepare the dough, wrap it tightly in plastic, and refrigerate it for up to 2-3 days, or freeze it for up to 3 months. Thaw frozen dough in the refrigerator overnight before rolling and cutting.
