 Save
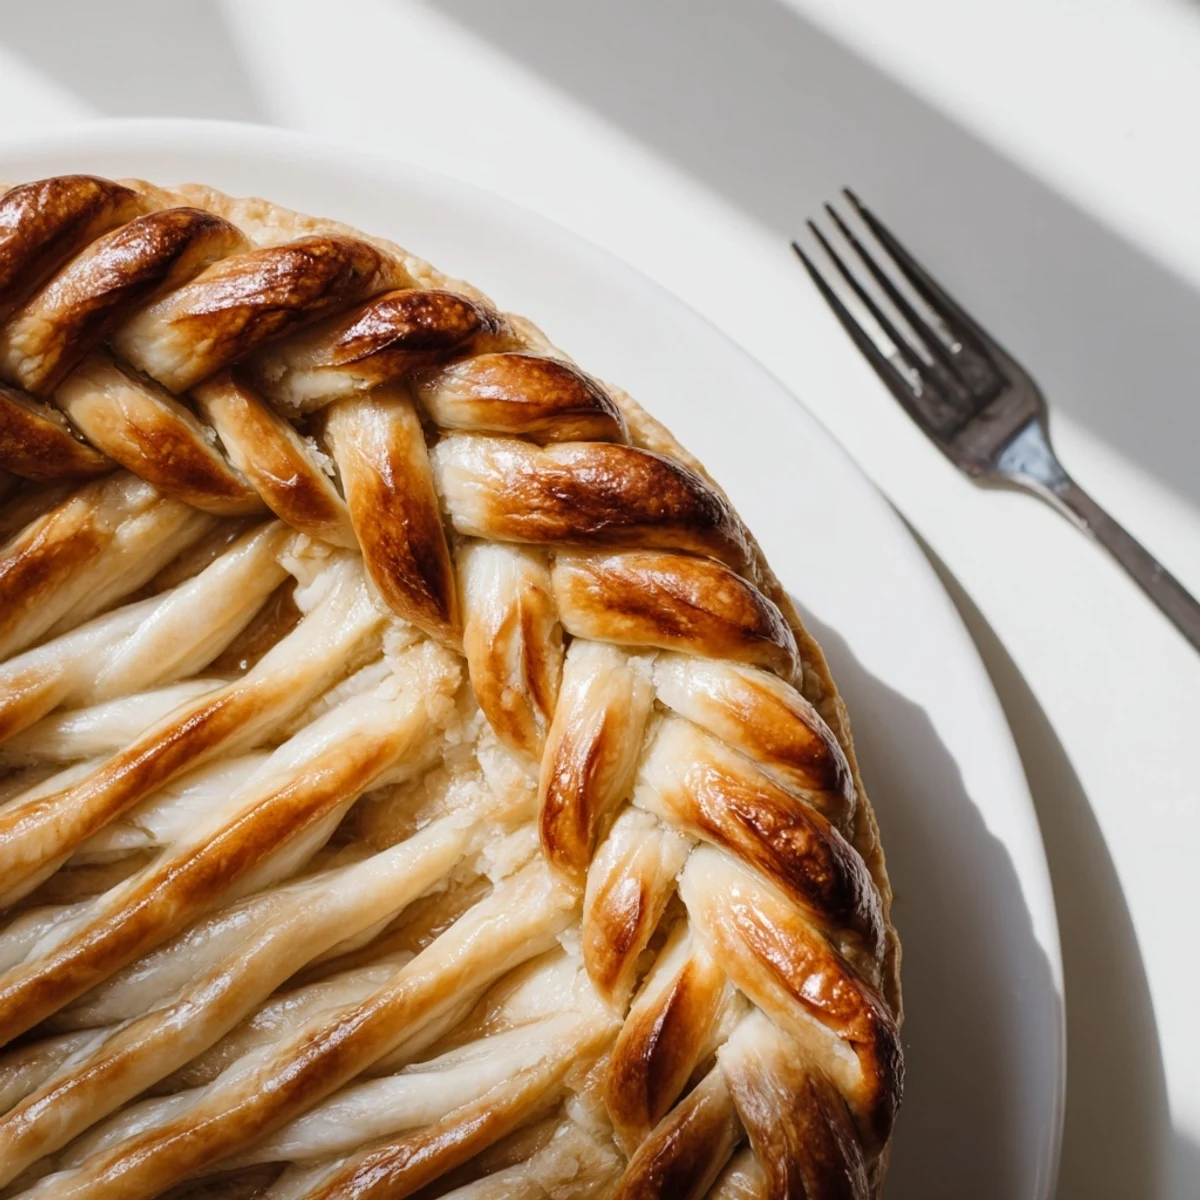
Save Transform ordinary pies into stunning centerpieces with this fishtail braid crust technique. The woven design creates a professional, bakery-quality finish that works beautifully with fruit pies, quiches, and savory pot pies alike. Keep your dough chilled and work quickly for the cleanest braids, then brush with egg wash for a golden, glossy finish.
The kitchen counter was dusted with flour, sunlight streaming through the window, when I first attempted a fishtail braid crust. My grandmother watched, amused, as I fumbled through what seemed like an impossibly elegant technique. That first attempt was messy, but the look on my family's faces when I brought that pie to the table made every frustrated moment worth it. Now it's my go-to trick for turning ordinary pies into conversation pieces.
I made this crust for my daughter's birthday last spring, a strawberry rhubarb pie that needed to match the excitement of the day. She stood beside me on a step stool, pressing dough ends together with sticky fingers, asking if we could make it rainbow colored next time. That braid sat golden and proud on the pie, and somehow it tasted better just for being beautiful.
Ingredients
- 2 1/2 cups all-purpose flour: The foundation that creates structure and flake, so measure carefully and spoon into your cup rather than scooping directly
- 1 cup unsalted butter: Must be ice cold to create those magical flaky layers, so pop it in the freezer for 15 minutes before starting
- 1 tsp salt: Enhances flavor and strengthens gluten, but use fine salt to avoid pockets of saltiness
- 1 tbsp sugar: Optional but lovely for sweet pies, lending subtle sweetness and helping with browning
- 1/4 to 1/2 cup ice water: Add gradually and trust your hands, some days flour needs more moisture than others
- 1 egg beaten with milk: Creates that gorgeous professional finish that makes your pie look like it came from a bakery
Instructions
- Mix the dry foundation:
- Whisk flour, salt, and sugar in a large bowl until thoroughly combined and airy
- Work in the butter:
- Cut cold butter into flour using a pastry cutter or your fingers until you see pea-sized chunks throughout
- Bring dough together:
- Add ice water gradually, tossing gently with a fork until dough holds when squeezed
- Chill and relax:
- Divide dough in half, form into disks, wrap tightly, and refrigerate for at least one hour
- Roll and measure:
- Roll chilled dough into a rectangle about 1/8 inch thick and cut strips 1/2 inch wide and 12 inches long
- Create the fishtail:
- Cross outer strips to center alternately, always pulling from the outside edge, until braid is complete
- Adorn your pie:
- Brush pie edge with water, gently position braid around rim, and press lightly to secure
- Finish with shine:
- Brush braid generously with egg wash for that bakery worthy golden glow
 Save
Save There's something meditative about braiding dough, standing at the counter while the rest of the house is quiet. I've made this crust for holidays, dinner parties, and Tuesday nights just because. Every single time, someone pauses midconversation to admire the edge, and that small moment of wonder makes the extra effort completely worthwhile.
Temperature Control Secrets
Cold ingredients are nonnegotiable for flaky results, so I keep my flour in the freezer during summer months. The butter must stay in distinct pea sized pieces throughout mixing, creating pockets that steam into flaky layers. If your kitchen runs warm, chill your rolling pin and work surface too.
Braid Variations That Wow
Once you master the basic fishtail, try mixing colored doughs from beets, spinach, or turmeric for stunning visual effects. I've woven herbs like rosemary directly into savory braids and added cinnamon sugar to sweet versions. The possibilities become endless once you understand how the strips behave together.
Make Ahead And Storage Wisdom
You can cut and braid strips up to two days ahead, storing them layered between parchment in the refrigerator. This actually makes assembly easier since chilled braids hold their shape beautifully. Simply arrange them on your pie when ready, allowing an extra 15 minutes of chilling before baking if they've softened at all.
- Freeze unbaked braided crusts for up to three months and bake directly from frozen
- Leftover trimmed strips bake into adorable cheese straws sprinkled with parmesan
- Egg wash can be made with cream or plant milk for different shine levels
 Save
Save Every pie deserves a beautiful frame, and this braid turns even the simplest filling into something special. Happy baking, friends.
Your Questions Answered
- → Why does my dough become difficult to braid?
-
Warm dough becomes soft and sticky, making it challenging to handle. Keep your dough chilled until ready to braid, and work quickly. If strips become too soft, return them to the refrigerator for 10-15 minutes before continuing.
- → Can I make the braids ahead of time?
-
Yes, you can prepare the braids up to 24 hours in advance. Wrap them tightly in plastic and refrigerate. When ready to use, let them sit at room temperature for just a few minutes to become pliable before arranging on your pie.
- → How many braids do I need for one pie?
-
For a standard 9-inch pie, you'll typically need 2-3 fishtail braids to cover the entire edge. Each braid should be about 12 inches long. The exact number depends on how tightly you space them around the rim.
- → What's the purpose of egg wash?
-
Egg wash creates a beautiful golden sheen and helps the braid edges bake evenly. For an extra glossy finish, mix the egg with a tablespoon of milk or water. You can also use cream or plant-based milk as alternatives.
- → Can I use this technique for different pie sizes?
-
Absolutely. Adjust the length and number of braids accordingly. For mini pies or tartlets, cut thinner, shorter strips. For larger deep-dish pies, you may need 3-4 longer braids to cover the extended circumference.
- → What fillings work best with this decorative crust?
-
This versatile design complements almost any filling. Fruit pies like apple, cherry, and berry showcase the braid beautifully. It also works wonderfully with quiches, chicken pot pies, and even savory vegetable tarts for an elegant presentation.
