 Save
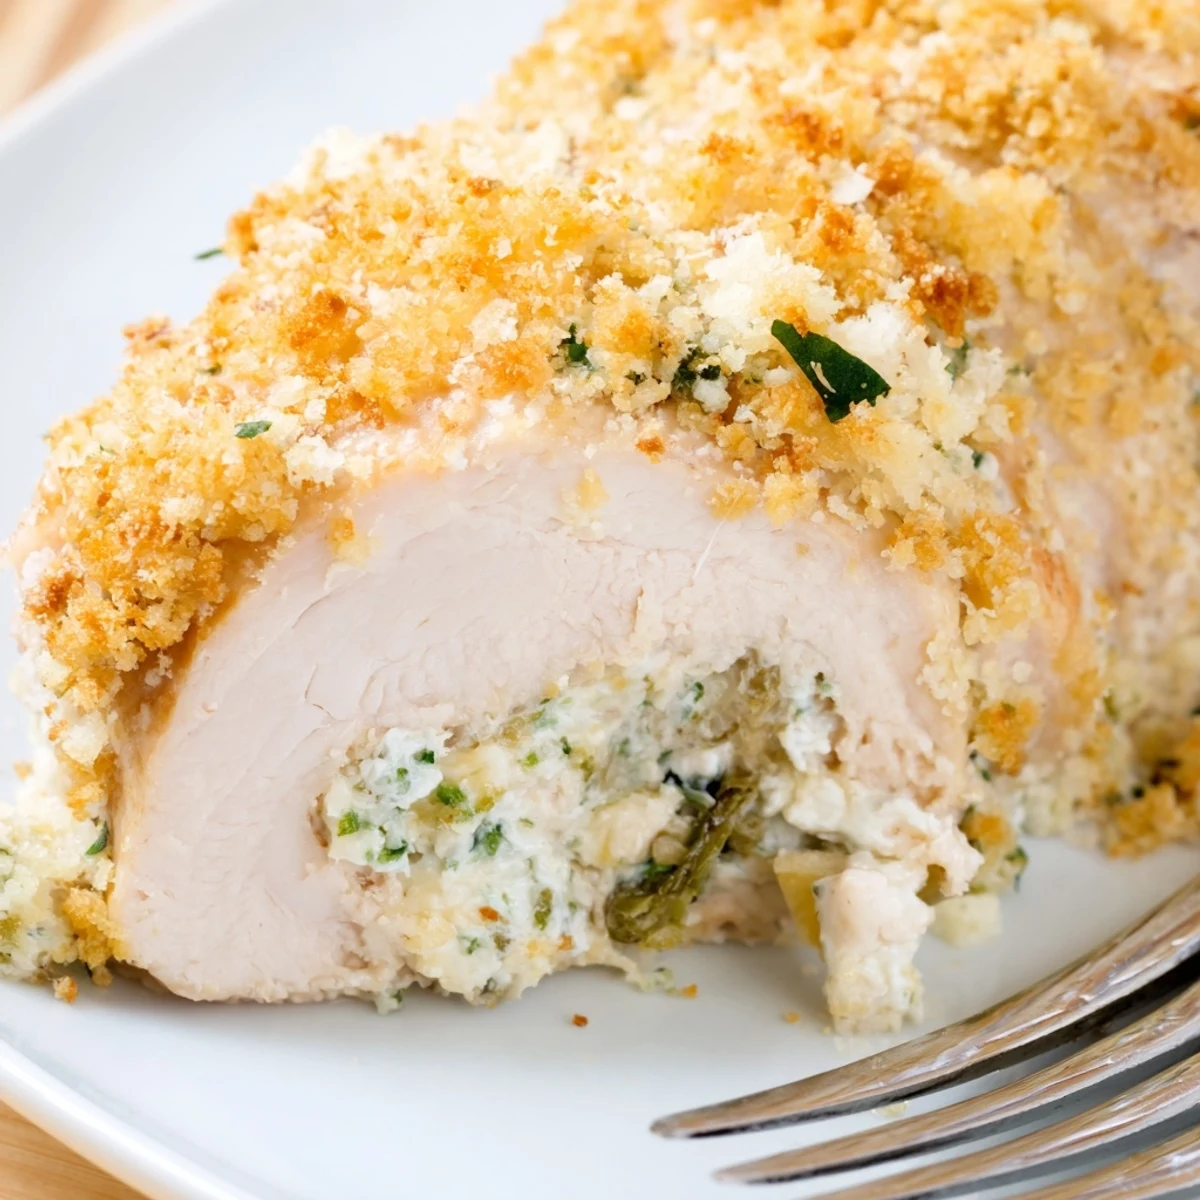
Save These elegant chicken rolls feature tender pounded breasts wrapped around a creamy herbed ricotta filling. The mixture combines fresh parsley, basil, and thyme with Parmesan and lemon zest for bright Italian flavors. A crispy breadcrumb topping adds satisfying texture while the chicken remains moist inside.
Ready in just 50 minutes, this dish delivers impressive presentation without complex techniques. The ricotta keeps the chicken juicy during baking, while the golden crust provides restaurant-worthy appeal. Perfect for entertaining or upgrading your weeknight dinner rotation.
The first time I made these chicken rolls, I was trying to impress someone who claimed they didn't like chicken breast because it was always dry and boring. Watching their face change from skeptical to delighted after that first bite taught me that the right filling can transform even the simplest protein into something worthy of a dinner party. The ricotta keeps everything moist while the herbs bring this bright freshness that makes you sit up straighter.
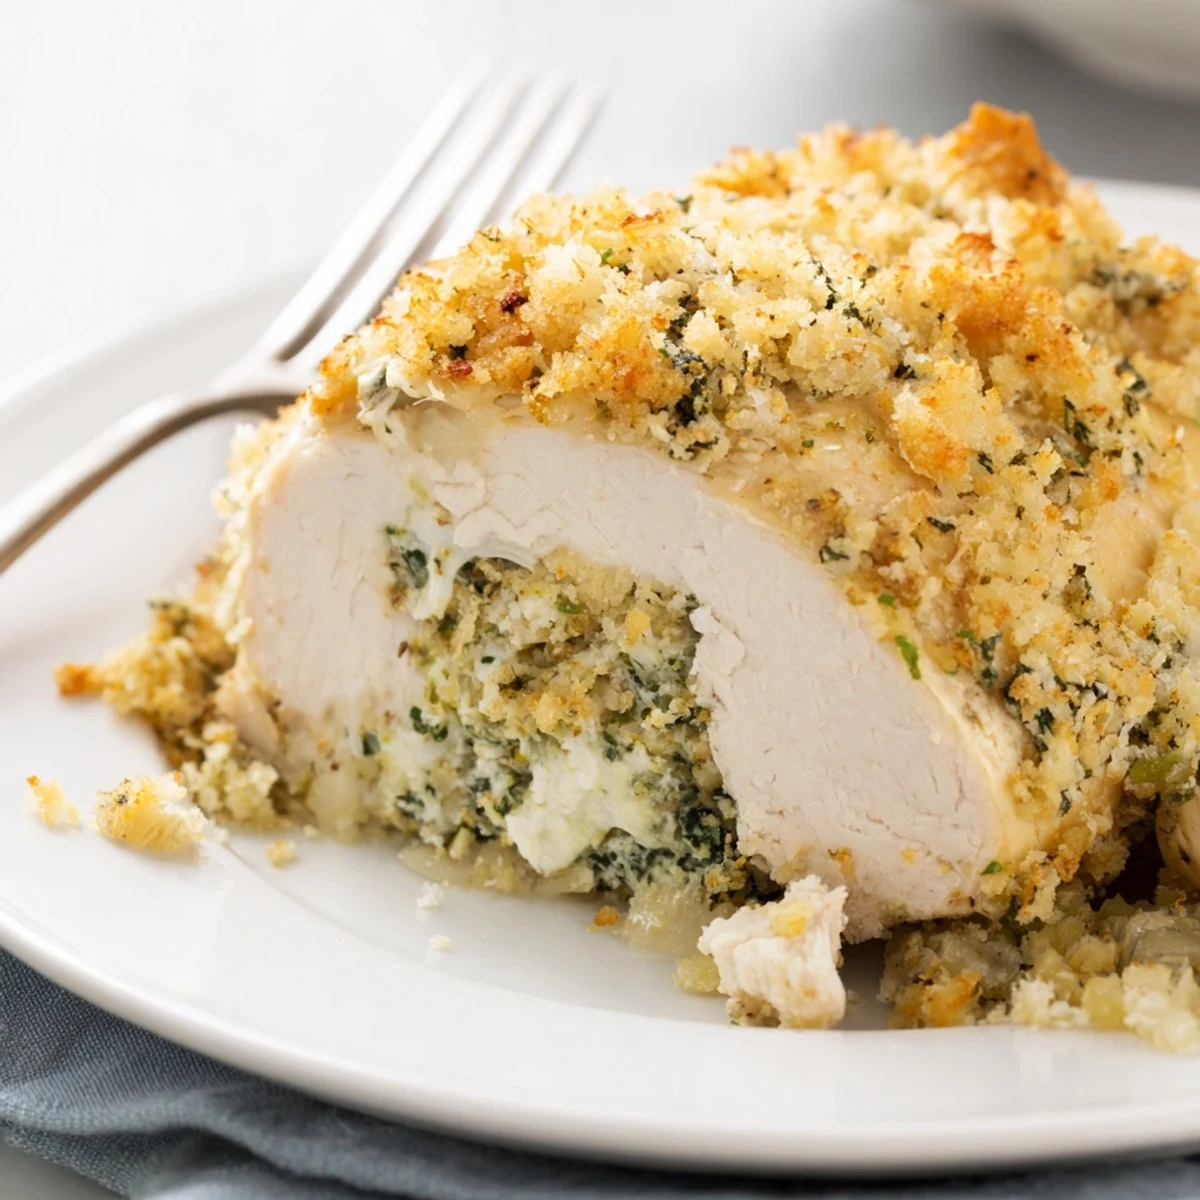
Last autumn I made these for a Tuesday dinner that stretched into midnight because nobody wanted to leave the table. There's something about rolling up ingredients that makes food feel more special, like you're putting extra care into each serving. The way the breadcrumb topping gets golden and slightly crisp while the ricotta turns creamy inside creates this perfect contrast that keeps everyone going back for seconds.
Ingredients
- Chicken breasts: Pounding them thin not only helps them cook evenly but also makes rolling easier without any tearing
- Ricotta cheese: Whole milk ricotta gives you the creamiest filling that won't dry out during baking
- Fresh herbs: The combination of parsley, basil and thyme creates layers of flavor that dried herbs just can't match
- Lemon zest: This tiny addition brightens everything and cuts through the richness of the cheese
- Breadcrumbs: Mixing Parmesan into the crumbs adds a savory crunch that makes the top irresistible
Instructions
- Prep your oven and pan:
- Preheat oven to 400°F and line a baking sheet with parchment paper for easy cleanup later.
- Flatten the chicken:
- Place chicken between plastic wrap and pound to 1/4 inch thickness, being gentle around the edges so they don't tear.
- Season the chicken:
- Sprinkle both sides with salt and pepper, treating them like you mean it.
- Make the filling:
- Mix ricotta, Parmesan, parsley, basil, thyme, garlic, lemon zest, salt and pepper until everything is evenly distributed.
- Fill and roll:
- Spread ricotta mixture over each chicken breast and roll tightly from the short end, securing with toothpicks if they want to unravel.
- Add the crunch:
- Mix breadcrumbs with Parmesan and olive oil, then press or sprinkle over the tops of your rolls.
- Bake to perfection:
- Cook for 28 to 32 minutes until the chicken reaches 165°F internally and the topping is golden brown.
- Rest before serving:
- Let the chicken rest for 5 minutes so the juices redistribute and the ricotta sets slightly.
 Save
Save My friend's mother used to make something similar for Sunday dinners, and learning that this was her way of making a little cheese go further while feeding a crowd made me appreciate the practical genius behind these rolls. They've become my go to when I want comfort food that still feels elegant, bridging that gap between everyday dinner and special occasion without any pretense.
Making Ahead
You can assemble these chicken rolls up to a day ahead and keep them covered in the refrigerator. The breadcrumb topping goes on right before baking, but having the filling and rolling done ahead transforms a potentially stressful dinner into something you can actually enjoy preparing.
Serving Suggestions
These pair beautifully with roasted vegetables that get caramelized in the same oven, or a simple arugula salad dressed with lemon vinaigrette to complement the ricotta's richness. I've found that lighter sides work better than heavy pasta since the chicken itself feels substantial.
Variations That Work
Sometimes I add chopped spinach to the ricotta mixture for extra color and nutrition, or sun dried tomatoes for a deeper savory note. During summer, fresh basil from the garden makes these sing, while winter batches benefit from extra garlic and a pinch of red pepper flakes.
- Try prosciutto wrapped around the outside for an extra salty punch
- Swap thyme for oregano to give it a more Italian American profile
- Add a layer of mozzarella over the ricotta for that irresistible cheese pull
 Save
Save There's something deeply satisfying about cutting into one of these rolls and seeing that spiral of creamy green filling against the golden chicken. Every time I make them, I'm reminded that the best recipes often come from simple ingredients treated with just enough care to make them shine.
Your Questions Answered
- → How do I pound chicken breasts evenly?
-
Place chicken between plastic wrap or parchment paper. Using a meat mallet, start from the center and work outward, pounding to an even 1/4-inch thickness. This ensures consistent cooking and easier rolling.
- → Can I prepare these chicken rolls ahead of time?
-
Yes, assemble the rolls up to 24 hours in advance and refrigerate tightly wrapped. Add the breadcrumb topping just before baking. You may need to add 2-3 minutes to the baking time if baking from cold.
- → What should I serve with herbed ricotta chicken rolls?
-
These pair beautifully with roasted vegetables, a fresh arugula salad, or light pasta dishes. The Italian flavors also complement sides like garlic mashed potatoes, sautéed spinach, or crusty bread to soak up any juices.
- → How do I know when the chicken is fully cooked?
-
Use a meat thermometer to check the internal temperature reaches 165°F (74°C) at the thickest part. The juices should run clear when pierced, and the meat should feel firm rather than squishy. The breadcrumb topping should be golden brown.
- → Can I freeze herbed ricotta stuffed chicken rolls?
-
Yes, assemble uncooked rolls and freeze individually on a baking sheet before transferring to a freezer bag. They'll keep for up to 3 months. Thaw overnight in the refrigerator before baking with the breadcrumb topping.
