 Save
Save Create bakery-worthy laminated bread at home with this French-inspired technique. The process involves rolling cold butter into enriched dough through a series of folds and turns, creating distinct flaky layers. After three turns of chilling and folding, shape into a loaf, proof until doubled, then bake to golden perfection. The result? A tender interior surrounded by irresistibly crisp, buttery layers that toast beautifully.
My tiny apartment kitchen became a flour-dusted laboratory the weekend I attempted croissant bread for the first time. I had this romantic notion about French patisseries and laminated doughs, but somehow ended up with butter melting through my fingers and panic in my eyes. Three failed attempts later, I finally understood that patience isn't just a virtue in bread making—it's the entire point.
I served this bread at a rainy Sunday brunch with friends who'd watched my croissant disasters unfold. When they pulled apart those shattering layers and golden flakes drifted down onto their plates like edible confetti, something clicked. This wasn't just bread anymore—it was proof that stubbornness in the kitchen sometimes pays off beautifully.
Ingredients
- All-purpose flour: This creates the structure needed to hold all those buttery layers together without tearing
- Instant yeast: I keep mine in the freezer and it never fails me, even months later
- Whole milk: Room temperature milk helps the dough come together smoothly and adds richness
- Unsalted butter (for butter block): European-style butter with higher fat content creates the most dramatic flaking
- Eggs: One goes into the dough for tenderness, another becomes your golden glossy finish
Instructions
- Mix your base dough:
- Combine flour, sugar, salt, and yeast in a large bowl, keeping yeast away from direct salt contact. Pour in warm milk, melted butter, and the egg, then mix until everything comes together into a sticky, shaggy dough that feels alive in your hands.
- Knead until transformed:
- Work the dough for 7 to 10 minutes until it's smooth, elastic, and bounces back when you poke it. Cover and let it rise in a greased bowl for about an hour until it's doubled in size and puffy.
- Chill for success:
- Punch down the risen dough, shape it into a rough rectangle, and refrigerate it for 30 minutes. Cold dough is your best friend for laminating—it keeps the butter from melting into the dough.
- Create your butter layer:
- On a floured surface, roll the dough into a 12 by 16-inch rectangle. Arrange cold butter slices over two-thirds of the dough, leaving the remaining third bare.
- First fold:
- Fold the unbuttered edge over the middle buttered section, then fold the remaining third over that. Rotate the dough 90 degrees so the openings face you.
- Roll and fold again:
- Roll back into a 12 by 16-inch rectangle, fold into thirds like a letter, wrap and chill for 30 minutes. This is your first complete turn.
- Complete the turns:
- Repeat the rolling, folding, and chilling process two more times for a total of three turns. Each turn creates more of those buttery layers that make croissant bread magical.
- Shape your loaf:
- After the final chill, roll the dough to about 8 by 16 inches. Roll it tightly from the short end into a cylinder, seam-side down.
- Final rise:
- Place in a greased 9 by 5-inch loaf pan and cover loosely. Let rise until doubled, about an hour, until the dough fills the pan and feels puffy.
- Golden finish:
- Preheat your oven to 375°F and whisk together the egg and milk for a shiny wash. Brush the entire surface gently.
- Bake to perfection:
- Bake for 35 to 40 minutes until deep golden brown and the loaf sounds hollow when tapped. If the top browns too quickly, tent with foil.
- Patience pays off:
- Cool in the pan for 10 minutes, then transfer to a wire rack. Wait until completely cool before slicing—this is the hardest part but essential for clean cuts.
 Save
Save The first time I nailed this recipe, I stood over the cooling loaf just watching it. When I finally sliced into it and heard that satisfying crackle of buttery layers giving way, I called my mom immediately. Some breads are meant to be shared, but this one felt like a personal victory I needed to tell someone about.
Temperature Control
Cold ingredients are the secret weapon of laminated dough. I've learned to work quickly during the rolling process, keeping everything from the countertop to my rolling pin as cool as possible. On warm days, I'll even chill my rolling pin in the freezer for a few minutes before starting.
Flour Management
Too much flour during rolling can make your bread tough and dense. Use just enough to prevent sticking, and brush off any excess before folding. I keep a small bowl of ice water nearby to dip my hands in if they start getting warm while working the dough.
Perfect Slicing
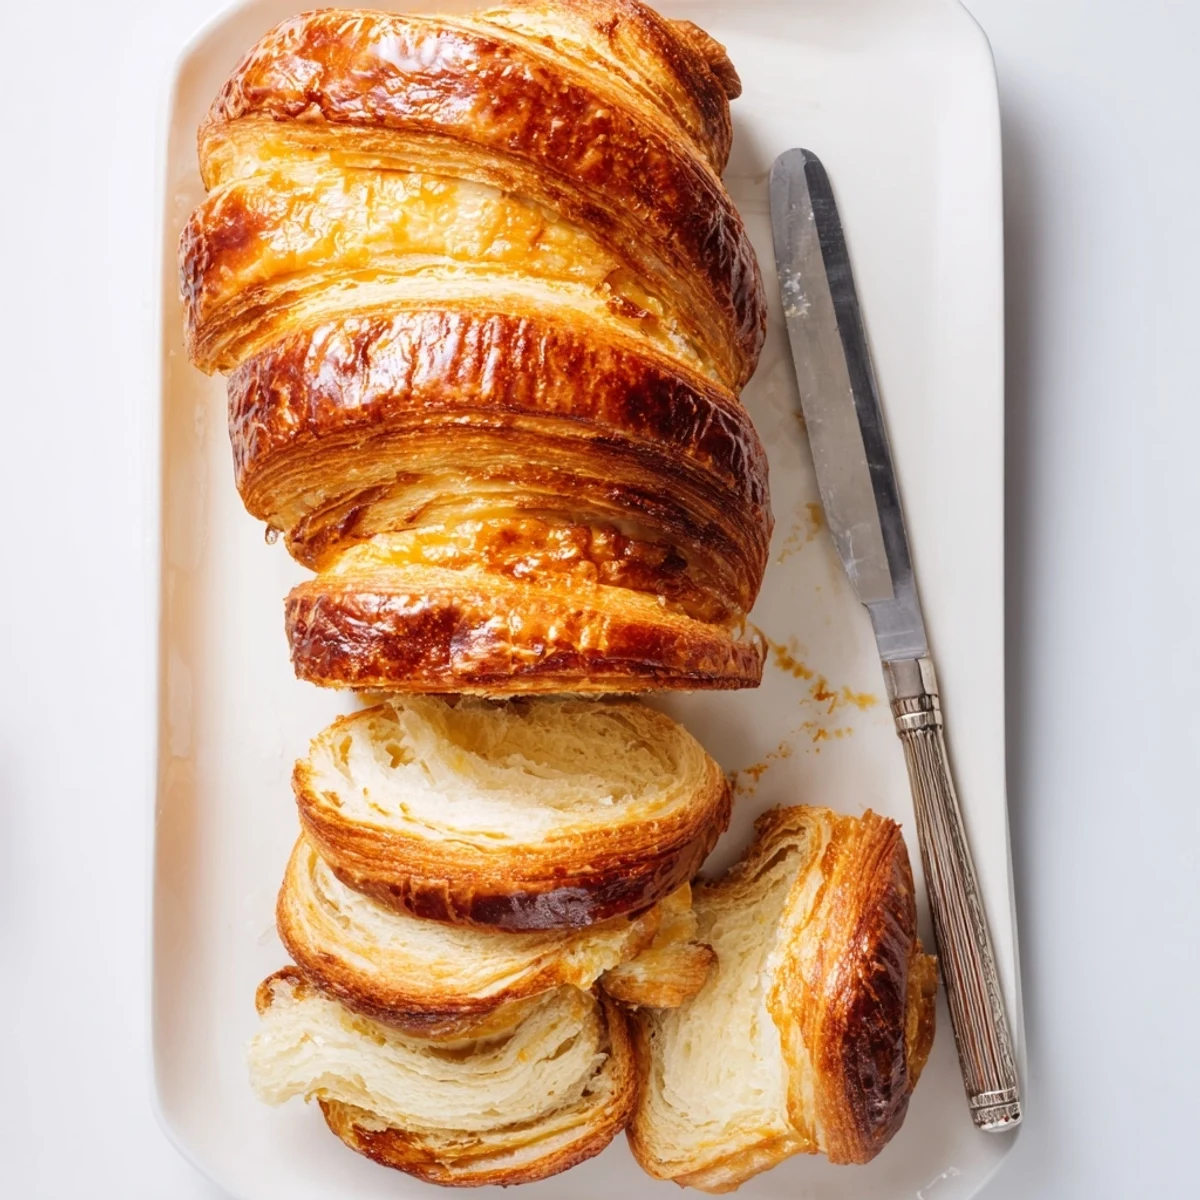
A serrated knife with a gentle sawing motion cuts through croissant bread without crushing those delicate layers. Let the bread cool completely—even if it takes every ounce of willpower you possess. Warm bread squishes, but cool bread shatters into perfect flaky slices.
- Toast leftover slices briefly to refresh the texture
- Wrap well and freeze for up to a month
- Slice thinly for the most dramatic layering effect
 Save
Save There's something deeply satisfying about turning simple ingredients into something that feels like magic. Maybe that's why I keep making this bread, long after the novelty has worn off and my kitchen has seen countless flour explosions.
Your Questions Answered
- → What makes croissant bread different from regular bread?
-
Croissant bread incorporates a lamination technique where cold butter is folded into the dough multiple times. This creates distinct flaky layers similar to traditional croissants, unlike standard breads which have a uniform crumb structure throughout.
- → Can I skip the chilling steps?
-
The chilling periods are essential for keeping the butter cold and firm. Without proper chilling, the butter will melt into the dough during rolling, preventing the formation of flaky layers. Each chill ensures the butter remains in separate sheets.
- → How should I store this bread?
-
Keep at room temperature wrapped in plastic or a bread bag for up to 2 days. For longer storage, slice and freeze in a sealed container. Toast frozen slices directly without thawing for the best texture.
- → Why did my butter leak out during baking?
-
This typically happens when the dough gets too warm during rolling or the butter wasn't cold enough initially. Work quickly and chill thoroughly between turns. If your kitchen is warm, chill the dough more frequently.
- → Can I add sweet or savory variations?
-
Absolutely! Sprinkle cinnamon sugar before the final roll for a sweet version, or incorporate herbs and cheese for savory. You can also add chocolate chips or dried fruit during the shaping step.
