 Save
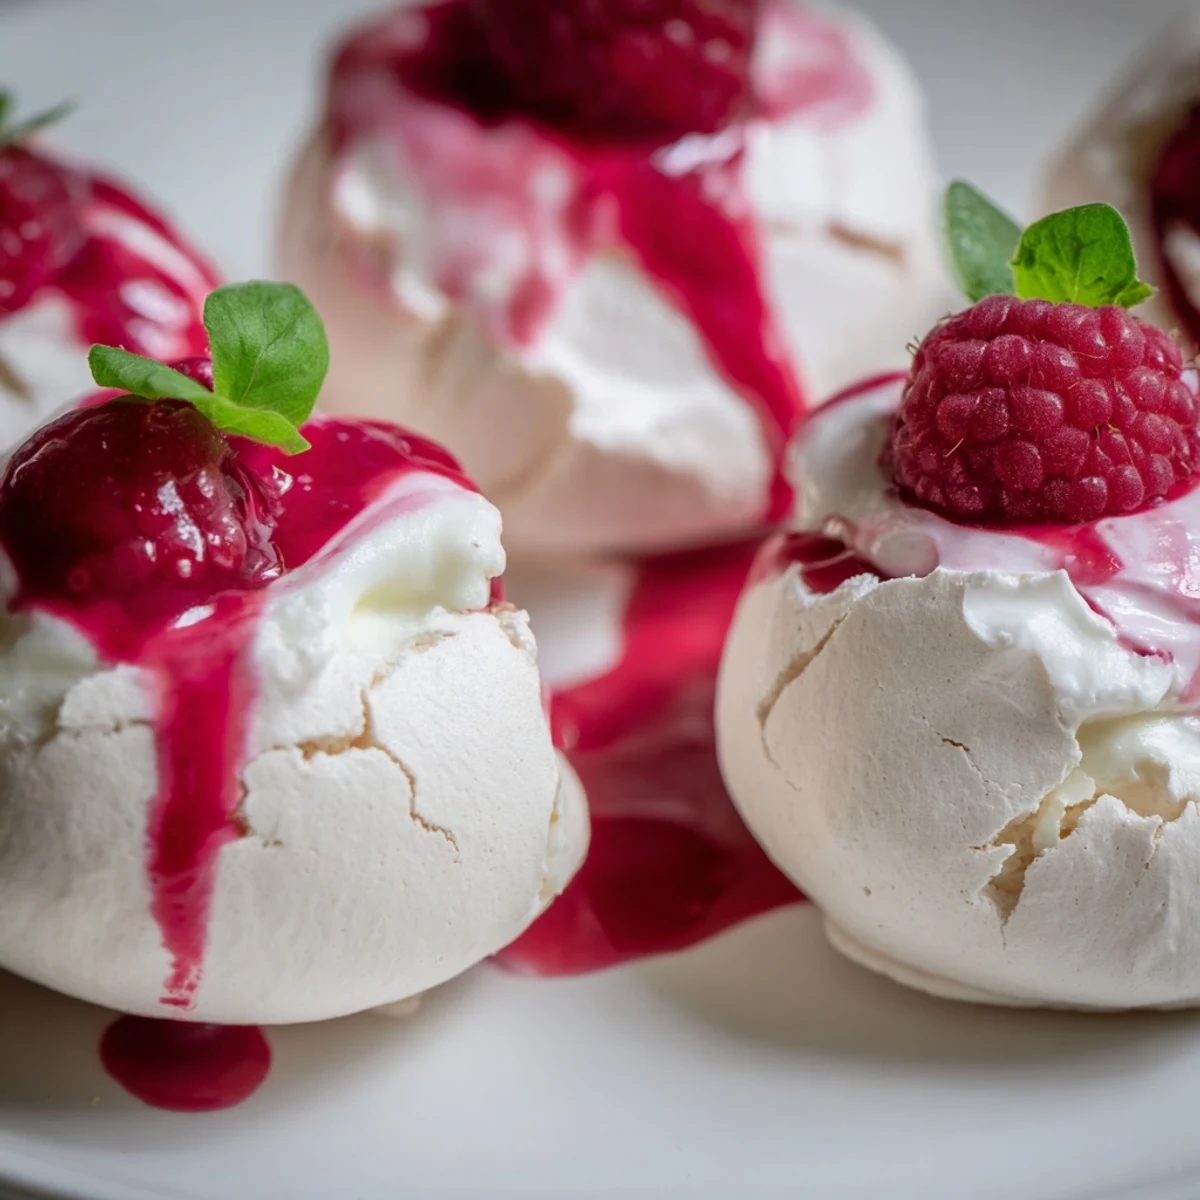
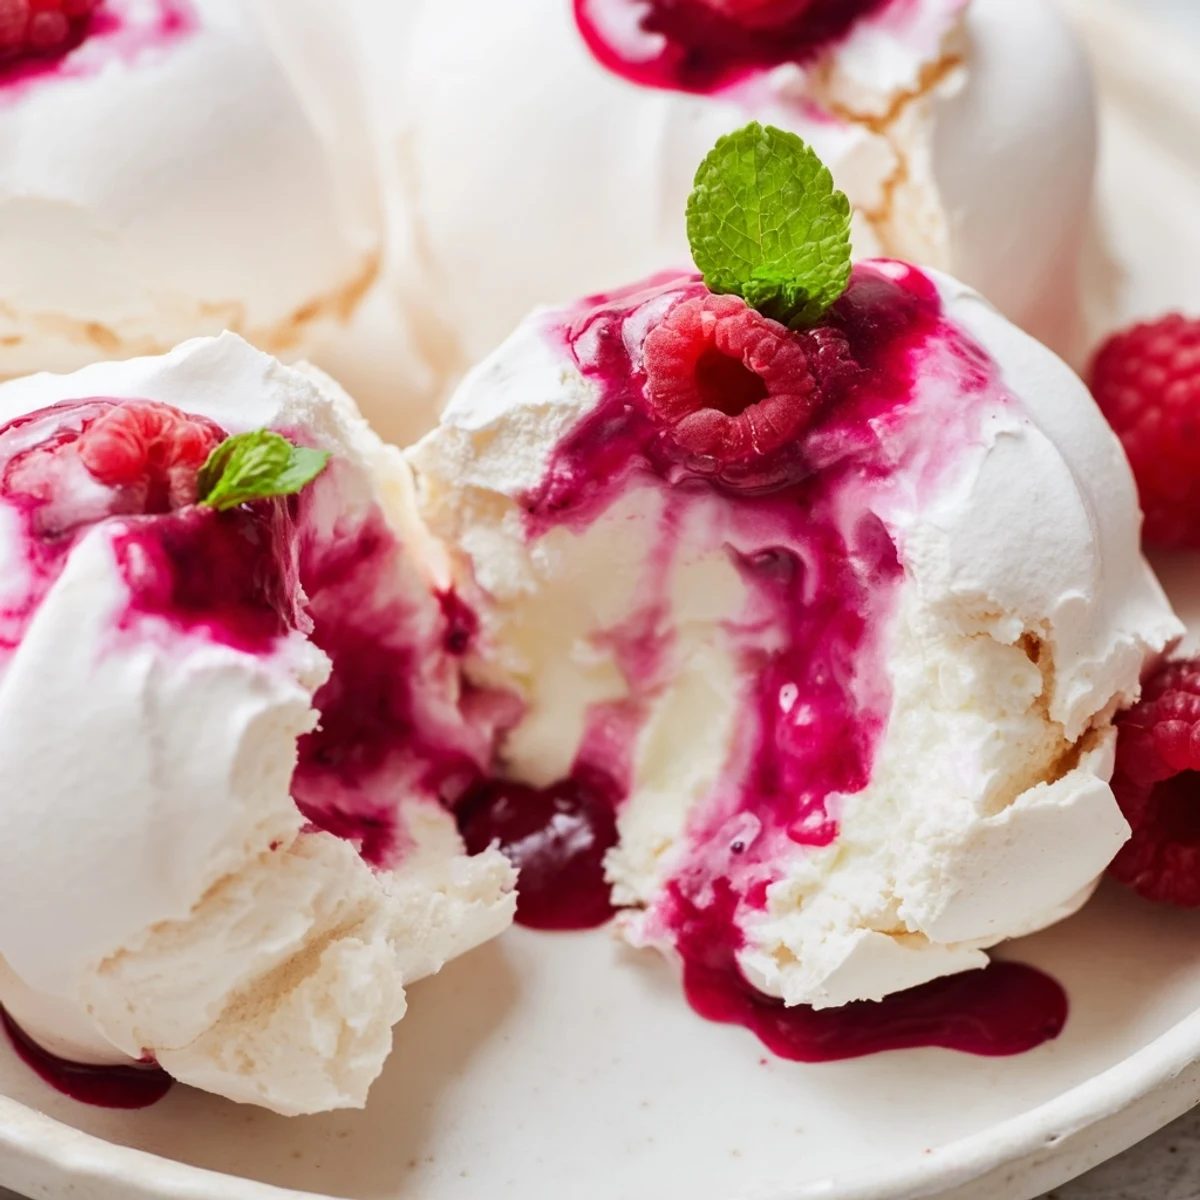
Save These pavlova bombs feature delicate meringue shells that are crisp outside yet marshmallow-soft within. Each bite-sized treat gets filled with lightly sweetened vanilla whipped cream, then drizzled with vibrant raspberry coulis for a perfect balance of sweet and tangy. The meringues bake slowly at low temperature, creating that signature texture that makes pavlova so beloved. Best assembled just before serving to maintain the satisfying contrast between the crisp exterior, soft interior, and creamy filling.
The first time I attempted these Pavlova bombs, I was terrified they would collapse. I had spent years watching my grandmother make perfect full-sized Pavlovas, her meringues towering like edible clouds. But these bite-sized versions felt like a different beast entirely, more delicate and demanding. When they came out of the oven with their crisp shells and I bit into that first marshmallow center, I knew they were worth every anxious moment.
I made these for my sisters summer garden party last year. She had requested something elegant but easy for guests to mingle with. Watching people light up when they bit into these little meringue clouds was unforgettable. The raspberry coulis stained lips and sparked conversations about summer memories and childhood desserts.
Ingredients
- 4 large egg whites: Room temperature is crucial here, cold whites simply will not achieve the volume you need
- 200 g caster sugar: Adding it gradually, one tablespoon at a time, is what creates that perfect glossy finish
- 1 tsp cornstarch: This tiny amount helps create that signature marshmallow center we all love
- 1 tsp white vinegar: The secret ingredient that stabilizes the meringue and ensures a crisp exterior
- 1 tsp vanilla extract: Use pure vanilla for the best flavor, it really shines through the sweetness
- 200 ml heavy cream: Keep it ice cold until you are ready to whip, it makes all the difference
- 2 tbsp powdered sugar: This dissolves more easily than granulated sugar in the whipped cream
- 250 g raspberries: Fresh or frozen both work beautifully, but frozen might need slightly longer cooking time
- 50 g sugar: Adjust this depending on how tart your raspberries are
- 1 tbsp lemon juice: Brightens the coulis and helps cut through the rich cream
Instructions
- Prepare your oven and tray:
- Preheat to 110°C and line your baking tray with parchment paper. Do not grease it, the meringue needs to grip the surface slightly.
- Create the meringue base:
- Whisk those room temperature egg whites until soft peaks form, then add sugar one tablespoon at a time. Keep whisking until the mixture is glossy and stiff peaks form when you lift the whisk.
- Add the secret ingredients:
- Gently fold in the cornstarch, vinegar, and vanilla. Do not over mix, you want to preserve all that air you just worked so hard to incorporate.
- Shape your bombs:
- Spoon or pipe small mounds, about golf ball sized, onto your prepared tray. Space them generously apart because they will expand slightly in the oven.
- The slow bake:
- Bake for exactly one hour. Then turn off the oven and leave the door slightly ajar, letting them cool completely inside. This gradual cooling prevents cracking.
- Make the raspberry coulis:
- While meringues cool, simmer raspberries, sugar, and lemon juice for 5 to 7 minutes until they break down completely. Press through a fine sieve and chill until ready to serve.
- Prepare the whipped cream:
- Whip the cold cream with powdered sugar and vanilla until soft peaks form. Be careful not to over whip or it will be difficult to pipe into the meringues.
- Assemble your bombs:
- Carefully cut a small cavity in the base of each cooled meringue and fill with whipped cream. Drizzle generously with that beautiful raspberry coulis.
 Save
Save These have become my go-to dinner party dessert. There is something so satisfying about watching guests try them for the first time, their eyes widening at that first bite. The combination of textures and flavors never fails to impress, even among people who claim they do not like dessert.
Make Ahead Magic
The meringues can be baked up to three days in advance and stored in an airtight container. The coulis keeps beautifully in the refrigerator for up to a week. Just fill them right before serving to maintain that perfect crisp exterior.
Flavor Variations
I have experimented with different coulis flavors and passion fruit creates an incredibly tropical version. A mango coulis works beautifully in summer, while a blackberry version feels more autumnal. You could also fold some lemon curd into the whipped cream for an extra layer of flavor.
Serving Suggestions
These bombs pair wonderfully with sparkling wine, the bubbles cutting through the rich cream and sweet meringue. For a non-alcoholic option, try them with a berry-infused sparkling water. Arrange them on a vintage cake stand for maximum visual impact.
- Fill them no more than an hour before serving to prevent sogginess
- Use a small serrated knife to create the cavity in the meringue base
- Leftover coulis is delicious over vanilla ice cream or yogurt
 Save
Save These little bombs bring such joy to any table. Hope they become a treasured part of your dessert repertoire too.
Your Questions Answered
- → Can I make the meringue bombs ahead of time?
-
Yes, bake the meringue shells up to 2 days in advance. Store in an airtight container at room temperature. Fill with cream and add coulis just before serving to maintain the perfect crisp texture.
- → What's the best way to create the cavity for filling?
-
Use a small, sharp knife to carefully cut a cone-shaped cavity in the base of each cooled meringue. Alternatively, gently press with your thumb to create a hollow center without cutting through the sides.
- → Can I substitute the raspberries in the coulis?
-
Absolutely. Try strawberries, blackberries, or a mixed berry blend. Adjust sugar slightly depending on the natural sweetness of your chosen berries. The method remains the same.
- → Why do I need to add cornstarch and vinegar to the meringue?
-
Cornstarch stabilizes the meringue structure, while vinegar helps create that soft, marshmallow-like center inside the crisp shell. These ingredients are essential for achieving authentic pavlova texture.
- → How do I know when the meringues are done baking?
-
After 1 hour at 110°C, the meringues should feel dry and crisp to the touch, easily lift from the parchment, and sound hollow when tapped underneath. They should remain white, not browned.
- → Can I make larger pavlova instead of bite-sized bombs?
-
Yes, shape into one large mound or individual nest-sized portions. Adjust baking time—larger meringues may need 1.5-2 hours. The filling and coulis quantities work perfectly for any size.
