 Save
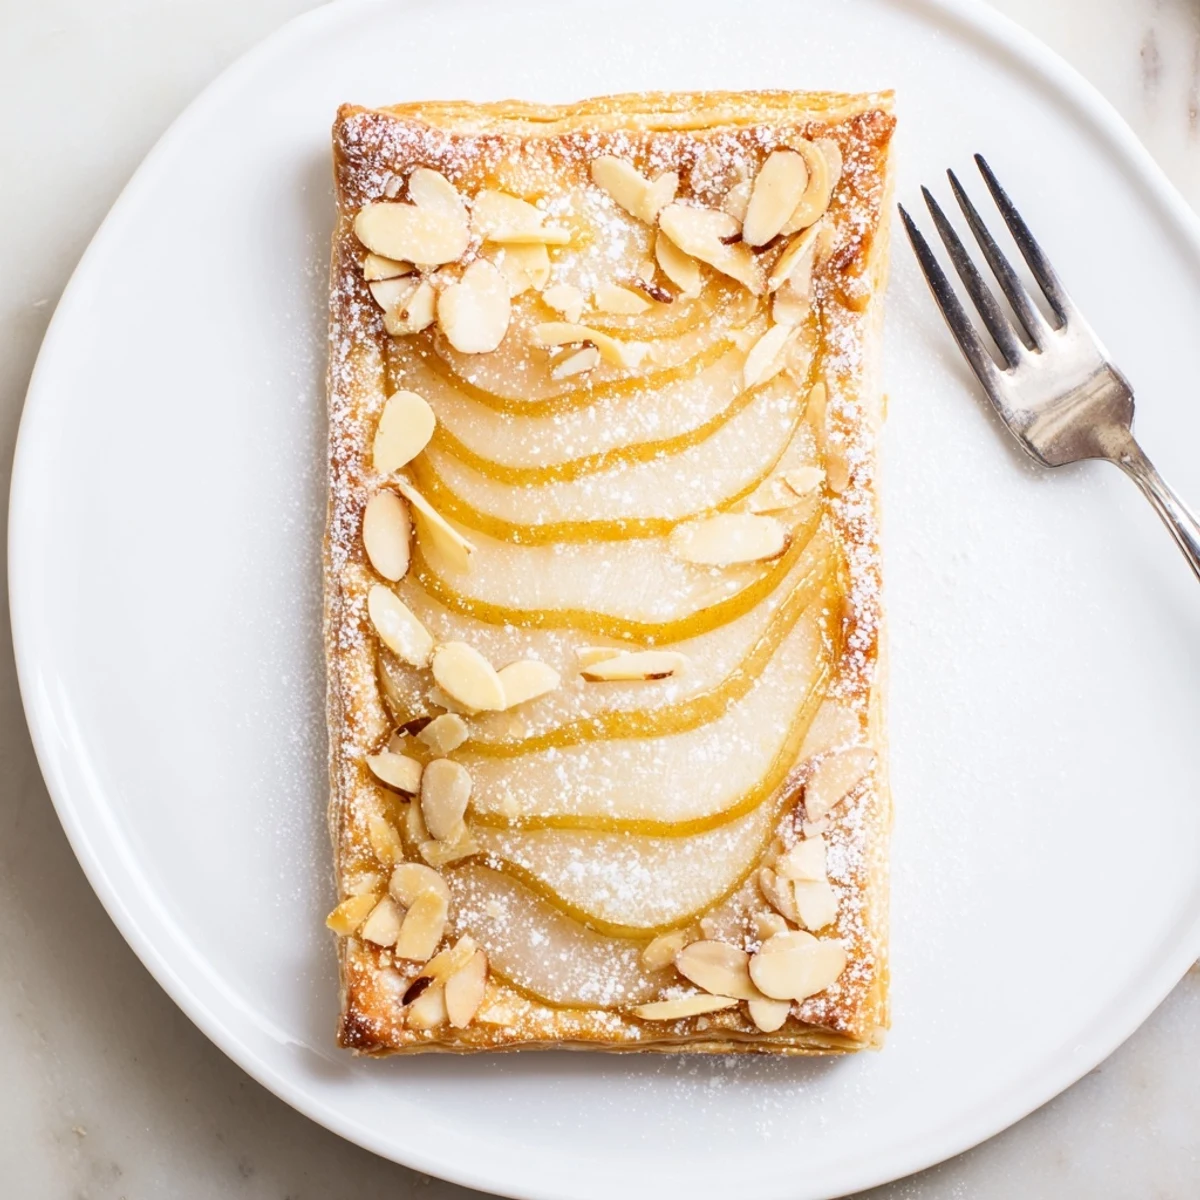
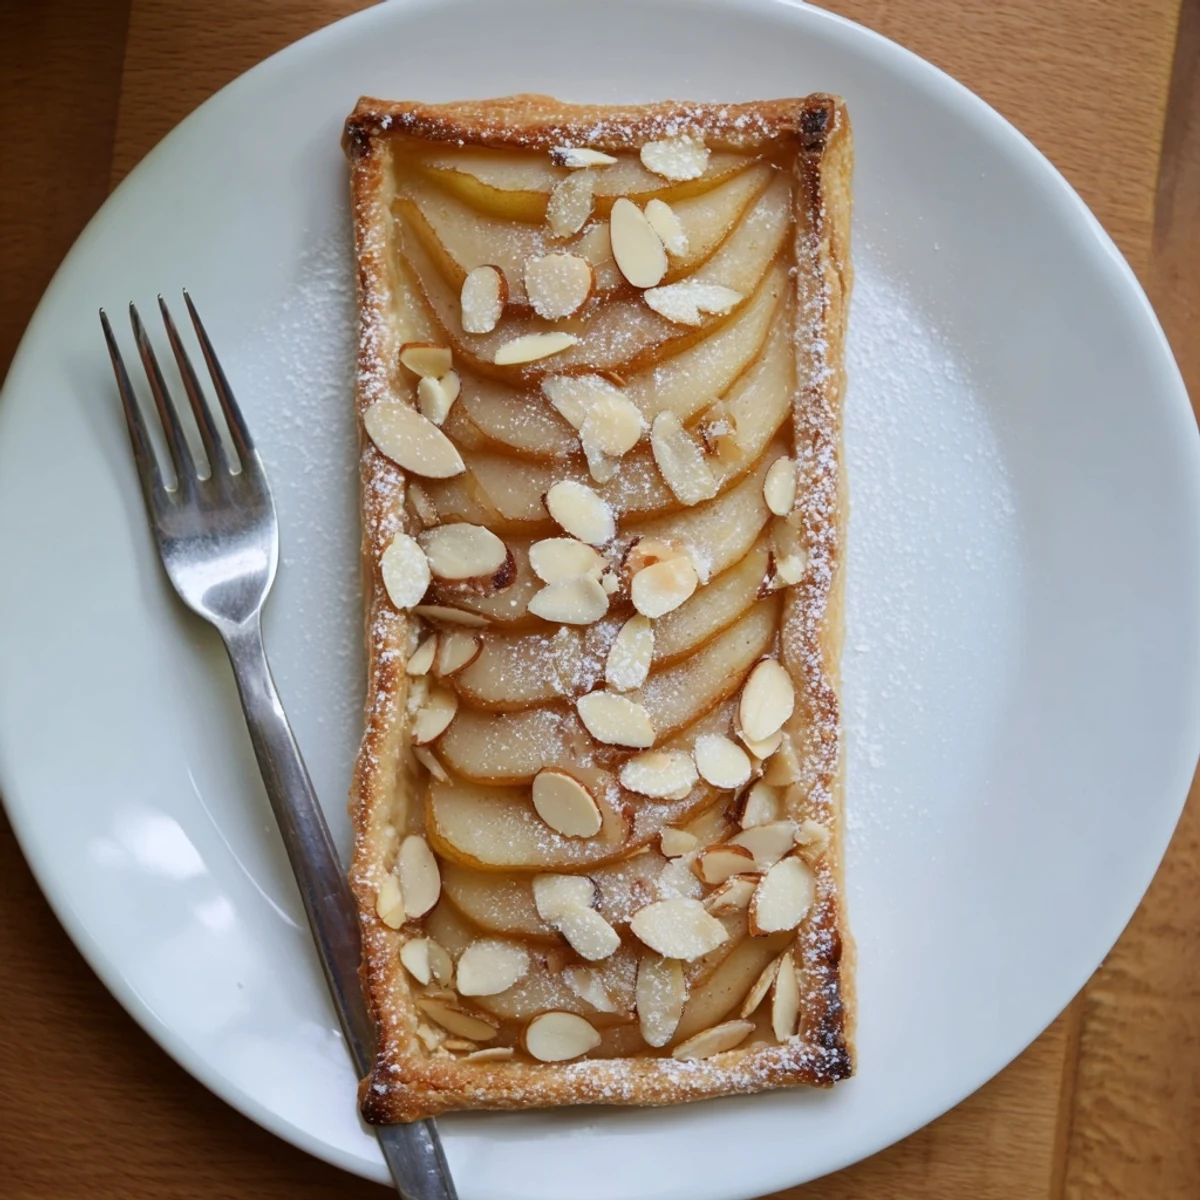
Save These elegant tarts combine flaky, buttery puff pastry with tender spiced pears that caramelize beautifully in the oven. The pears are macerated with warm spices like cinnamon, nutmeg, and ginger, then arranged on golden pastry and brushed with melted butter for extra richness. Ready in just 45 minutes with only 20 minutes of active prep, these make an impressive yet effortless dessert for entertaining or a special weeknight treat.
There was this rainy Sunday last November when I found myself with three pears slowly softening on the counter and a sheet of puff pastry I'd forgotten about in the freezer. Something about the gray afternoon made me crave warm, spiced things, and I ended up improvising these tarts with whatever spices I could reach in the cupboard. The way the kitchen started smelling like cinnamon and caramel was absolutely intoxicating, and I knew I'd stumbled onto something special.
I made these again for my book club last month, and honestly, the quiet that fell over the room when everyone took their first bite was pretty incredible. Someone actually asked if I'd been secretly taking pastry classes, which I'm still laughing about considering I was still in my yoga pants when they arrived.
Ingredients
- 3 ripe pears, peeled, cored, and thinly sliced: I've learned that slightly underripe pears hold their shape better during baking, so don't wait until they're soft
- 1 tablespoon lemon juice: This keeps the pears from oxidizing and adds a bright note that cuts through all that warm spice
- 3 tablespoons brown sugar: The molasses in brown sugar creates such a lovely depth of caramel flavor you just can't get from white sugar
- 1 teaspoon ground cinnamon: Classic for a reason, but I promise it won't overpower the delicate pear flavor
- 1/4 teaspoon ground nutmeg: Just enough to add that mysterious background warmth people can never quite identify
- 1/4 teaspoon ground ginger: Gives a gentle zing that makes everything else taste more vibrant
- Pinch of salt: Seriously needed to balance all that sugar and let the fruit sing
- 1 sheet frozen puff pastry, thawed: I keep a stash in the freezer for exactly these moments, and all-butter makes a noticeable difference
- 1 egg, beaten: Creates that gorgeous golden sheen on the pastry edges
- 1 tablespoon unsalted butter, melted: Brushing this on the pears helps them caramelize beautifully in the oven
- 2 tablespoons sliced almonds: Totally optional but I love the little crunch they add against the soft fruit
- Powdered sugar, for dusting: Makes everything look like you tried way harder than you actually did
Instructions
- Get your oven ready:
- Preheat to 400°F (200°C) and line a baking sheet with parchment paper—don't skip this or you'll be scrubbing caramelized sugar off your pan later
- Coat the pears in all that spiced goodness:
- In a large bowl, toss the sliced pears with lemon juice, brown sugar, cinnamon, nutmeg, ginger, and salt, then let them sit for 10 minutes to get friendly with each other
- Prep the pastry canvas:
- Unroll the puff pastry on a lightly floured surface, cut into 6 equal rectangles or circles, and arrange them on your prepared baking sheet with some breathing room
- Create those golden edges:
- Brush the pastry borders with beaten egg—this is what gives you that professional bakery look
- Arrange the pears artistically:
- Drain off any excess liquid from the pears and arrange the slices in neat overlapping rows on each pastry rectangle, leaving about a half-inch border
- Add the finishing touches:
- Brush the pears with melted butter and scatter those sliced almonds on top if you're feeling fancy
- Transform in the oven:
- Bake for 22 to 25 minutes until the pastry is deeply golden and the pears are tender and starting to caramelize at the edges
- The final flourish:
- Let them cool just slightly so you don't burn your tongue, then dust with powdered sugar for that snow-kissed look
 Save
Save My mom actually called me while these were in the oven once, and I had to put her on speakerphone just so I could keep checking through the oven door. The cinnamon was perfuming the entire house and she kept asking what I was baking that smelled like a fancy French bakery.
Making Them Ahead
You can slice the pears and toss them with the sugar and spices up to an hour before baking, which actually helps them release some of their liquid. I wouldn't assemble the tarts more than 30 minutes before they go into the oven though, or the pastry might start to get soggy from the fruit juices.
Serving Suggestions
While these are absolutely perfect on their own, I'm not going to judge if you want to add a scoop of vanilla ice cream that melts into all those caramelized crevices. A dollop of crème fraîche adds this lovely tang that cuts through the richness too.
Fruit Variations
Apples work beautifully here, especially Honeycrisp or Granny Smith that hold their shape during baking. I've experimented with peaches in summer, though they release more juice so you might want to add a little extra flour to the fruit mixture to thicken things up.
- Pears that are slightly firm to start will become perfectly tender without turning into mush
- Sprinkle a tiny bit of coarse sugar on the pastry edges for extra crunch and sparkle
- These are best enjoyed the day they're made when that pastry is at its crispest
 Save
Save There's something about pulling a tray of these golden tarts out of the oven that feels like giving yourself a warm hug on a plate. I hope they bring as much cozy comfort to your kitchen as they have to mine.
Your Questions Answered
- → Can I use other fruits besides pears?
-
Yes, apples work wonderfully as a substitution. Peel, core, and slice them thinly just like the pears. The cooking time remains the same, and the spices complement both fruits beautifully.
- → Can I prepare these tarts ahead of time?
-
You can prepare the spiced pears and cut the pastry shapes up to a day ahead. Store them separately in the refrigerator. Assemble and bake just before serving for the best texture and flavor.
- → How do I know when the pastry is done?
-
The pastry should be deep golden brown and puffed up all over. The edges should be crisp, and the pears should be tender when pierced with a fork. If the pastry browns too quickly, tent with foil.
- → Can I use homemade puff pastry?
-
Absolutely. Homemade puff pastry works beautifully and often yields even better results. Just ensure it's well-chilled before cutting and baking to maintain those distinct flaky layers.
- → What's the best way to serve these tarts?
-
These tarts shine when served slightly warm, either plain or dusted with powdered sugar. They pair exceptionally well with vanilla ice cream, freshly whipped cream, or a drizzle of warm caramel sauce.
- → Why drain the pears before arranging?
-
Draining removes excess liquid released during maceration. This prevents the pastry from becoming soggy and ensures it bakes up crisp and flaky while the pears still retain all that spiced flavor.
