 Save
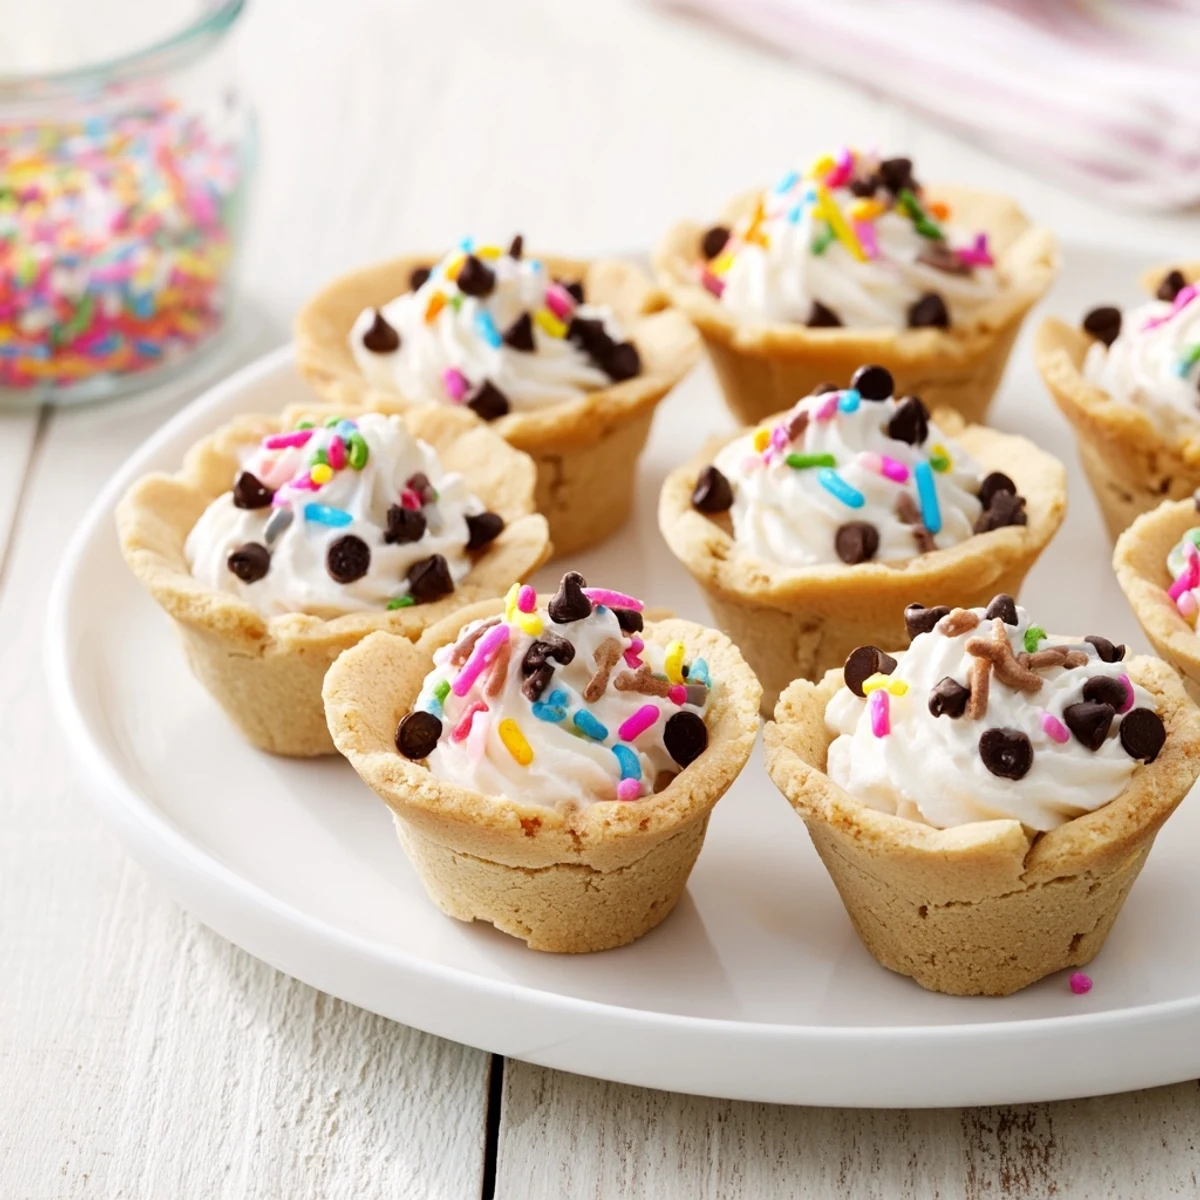
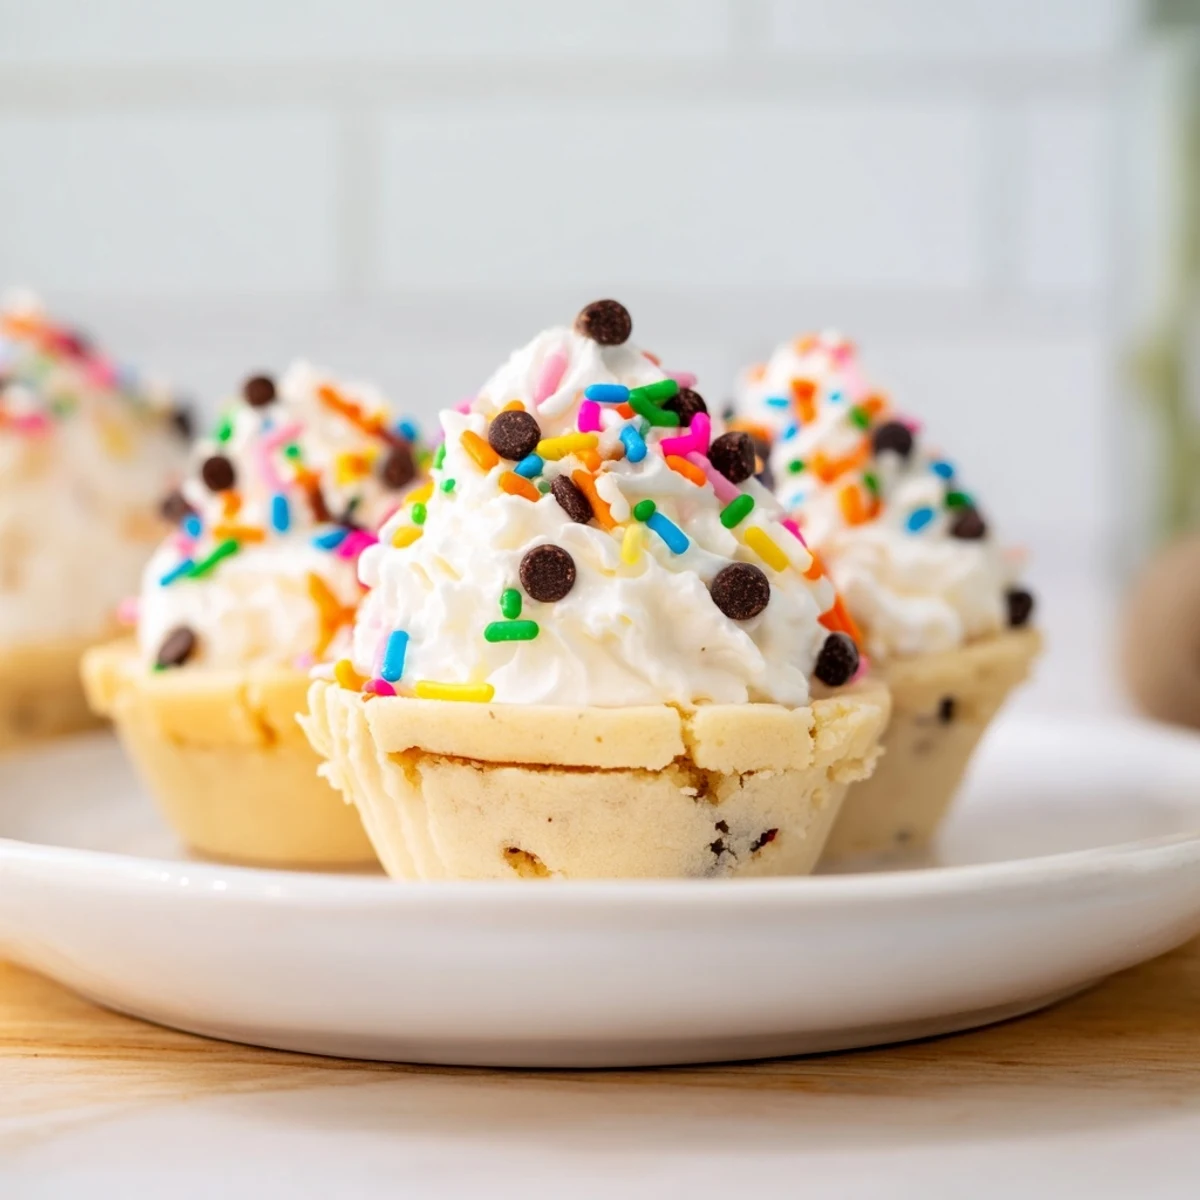
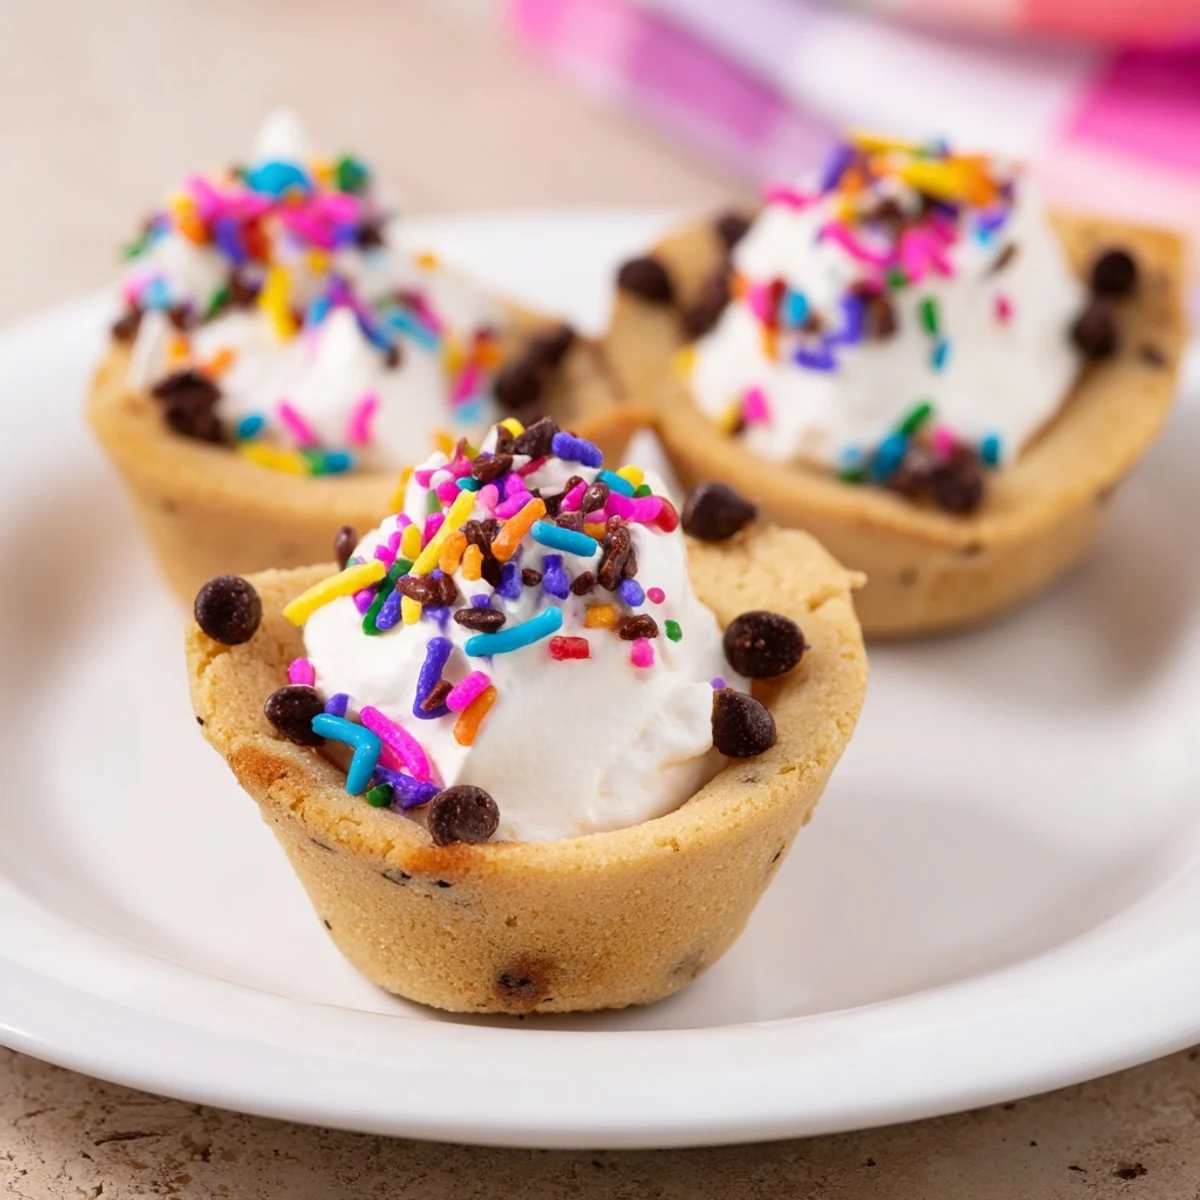
Save These delightful sugar cookie cups combine the classic taste of homemade sugar cookies with a fun, creative presentation. Baked in mini muffin tins, each cup features a tender, golden cookie shell that's perfect for holding your favorite fillings. The process involves pressing dough into muffin cups, creating a shallow well that deepens as it bakes. Once cooled, fill with freshly whipped vanilla cream, lemon curd, or chocolate ganache. Top with fresh berries, colorful sprinkles, or mini chocolate chips for a stunning dessert that's sure to impress at any gathering.
The first time I made sugar cookie cups, it was completely by accident. I'd run out of regular cookie sheets and grabbed my mini muffin tin in a moment of desperation, pressing sugar cookie dough into each cup just to see what would happen. When they came out of the oven with those perfect little wells, I realized I'd stumbled onto something brilliant—bite-sized vessels just waiting to be filled with whatever caught my imagination.
Last summer, I brought a platter of these to my niece's birthday party and watched them disappear faster than anything else on the table. The kids went straight for the ones topped with sprinkles, while the adults gravitated toward fresh berries and cream. What struck me most was how something so simple—basically a sugar cookie with an identity crisis—could make people so genuinely excited about dessert.
Ingredients
- All-purpose flour: The foundation that gives these cups their structure—measure by weight if you can for the most consistent results
- Baking soda and salt: Just enough to help the cups hold their shape without puffing up too much
- Unsalted butter: Softened to room temperature so it incorporates beautifully and creates that tender texture we want
- Granulated sugar: Creates the classic sugar cookie flavor while helping the edges get that perfect golden crispness
- Egg: Binds everything together and adds richness—one large egg is exactly what this recipe needs
- Pure vanilla extract: Dont be tempted to use imitation—real vanilla makes these taste like something from a bakery
- Heavy cream: Whipped into clouds for the simplest, most versatile filling imaginable
- Powdered sugar: Just enough to sweeten the cream without making it cloyingly sweet
Instructions
- Get your oven ready:
- Preheat to 350°F and grease your mini muffin tin really well—I learned the hard way that these little cups love to stick if you're not generous with the spray
- Whisk the dry ingredients:
- Combine flour, baking soda, and salt in a medium bowl, then set it aside while you work on the butter
- Cream the butter and sugar:
- Beat them together until the mixture looks pale and fluffy, about 2 minutes—this step is worth every second for the texture it creates
- Add the egg and vanilla:
- Beat until everything's incorporated and the mixture looks smooth and glossy
- Combine everything:
- Gradually add the dry ingredients to the wet, mixing just until you don't see flour anymore—overmixing makes tough cookies and nobody wants that
- Shape the cups:
- Scoop about 1 tablespoon of dough into each muffin cup, then press it up the sides with your fingers to create that little well in the center
- Bake to golden perfection:
- 10 to 12 minutes until the edges are lightly golden and the centers look set but still slightly soft
- Deepen the cups while warm:
- Use the back of a spoon to gently press the center down again immediately after baking, then let them cool in the tin for 10 minutes before transferring to a rack
- Whip the cream filling:
- Beat the cold cream with powdered sugar and vanilla until stiff peaks form—this happens faster than you expect, so keep a close eye on it
- Fill and top:
- Scoop or pipe the cream into each cooled cup, then add whatever toppings make you happy—berries, sprinkles, chocolate chips, or a combination of everything
 Save
Save My grandmother would have loved these, I think. She was all about desserts that brought people together, that got guests talking and choosing and customizing. Every time I set out a platter with bowls of different toppings, I imagine her nodding approvingly at the chaos of sprinkles and cream and sticky fingers.
Filling Ideas Beyond Cream
The whipped cream is just the beginning. I've filled these with lemon curd in spring, chocolate ganache when I need something richer, and even homemade jam for a breakfast-friendly version. The cookie itself is neutral enough that almost anything works, and the small size means you can offer multiple filling options without committing to a whole dessert's worth of any single flavor.
Making Them Ahead
The beauty of these cups is that they freeze exceptionally well. I bake a double batch whenever I have the oven on, cool them completely, and stash them in a freezer bag. They thaw at room temperature in about 30 minutes and taste just as fresh as the day they were baked. This has saved me more times than I can count when unexpected guests arrive or I suddenly need a dessert for a school event.
Getting Creative With Colors
Holiday cookie cups became something of a tradition in our house after my daughter discovered we could tint both dough and filling. Pastel shades for Easter, red and green for Christmas, orange and black for Halloween—suddenly these weren't just cookies anymore, they were edible decorations. A few drops of gel food coloring go a long way, and the effect is genuinely stunning on a dessert table.
- Use gel coloring instead of liquid for the most vibrant shades without altering the dough consistency
- Natural food dyes work beautifully if you're avoiding artificial colors—beet powder for pink, spinach powder for green
- Consider coloring the filling instead of the dough for a surprise inside each cup
 Save
Save There's something universally appealing about food you can eat in two bites, something that feels special without requiring a fork. These sugar cookie cups have become my go-to whenever I want to make people feel celebrated, whether it's a Tuesday afternoon or a holiday gathering.
Your Questions Answered
- → How do I prevent the cookie cups from sticking to the muffin tin?
-
Lightly grease your mini muffin tin with butter or cooking spray before adding the dough. Allow the cups to cool in the tin for about 10 minutes after baking—this helps them set and release more easily. Gently run a small knife around the edges if needed before transferring to a wire rack.
- → Can I make the cookie dough ahead of time?
-
Yes, prepare the dough up to 2 days in advance and store it tightly wrapped in the refrigerator. You can also scoop the dough into the muffin cups, cover the tin with plastic wrap, and refrigerate for up to 24 hours before baking. Let them sit at room temperature for 10 minutes before placing in the oven.
- → What other fillings work well in these cups?
-
Beyond vanilla whipped cream, try lemon curd for a bright, tangy contrast. Chocolate ganache creates a rich, decadent filling. Fruit preserves like raspberry or strawberry add sweetness and color. For a creamy option, fill with cheesecake batter or pastry cream. Nutella, peanut butter, or caramel sauce also make delicious fillings.
- → How should I store filled versus unfilled cookie cups?
-
Store unfilled cookie cups in an airtight container at room temperature for up to 3 days. Fill them just before serving to maintain the best texture and prevent sogginess. If you need to store filled cups, keep them refrigerated in an airtight container for up to 1 day, though the filling may soften the cookie slightly.
- → Can I freeze these cookie cups?
-
Freeze unfilled, completely cooled cookie cups in a freezer-safe container or bag for up to 2 months. Place parchment paper between layers to prevent sticking. Thaw at room temperature for about 30 minutes before filling and serving. Do not freeze filled cups as the texture will be compromised.
