 Save
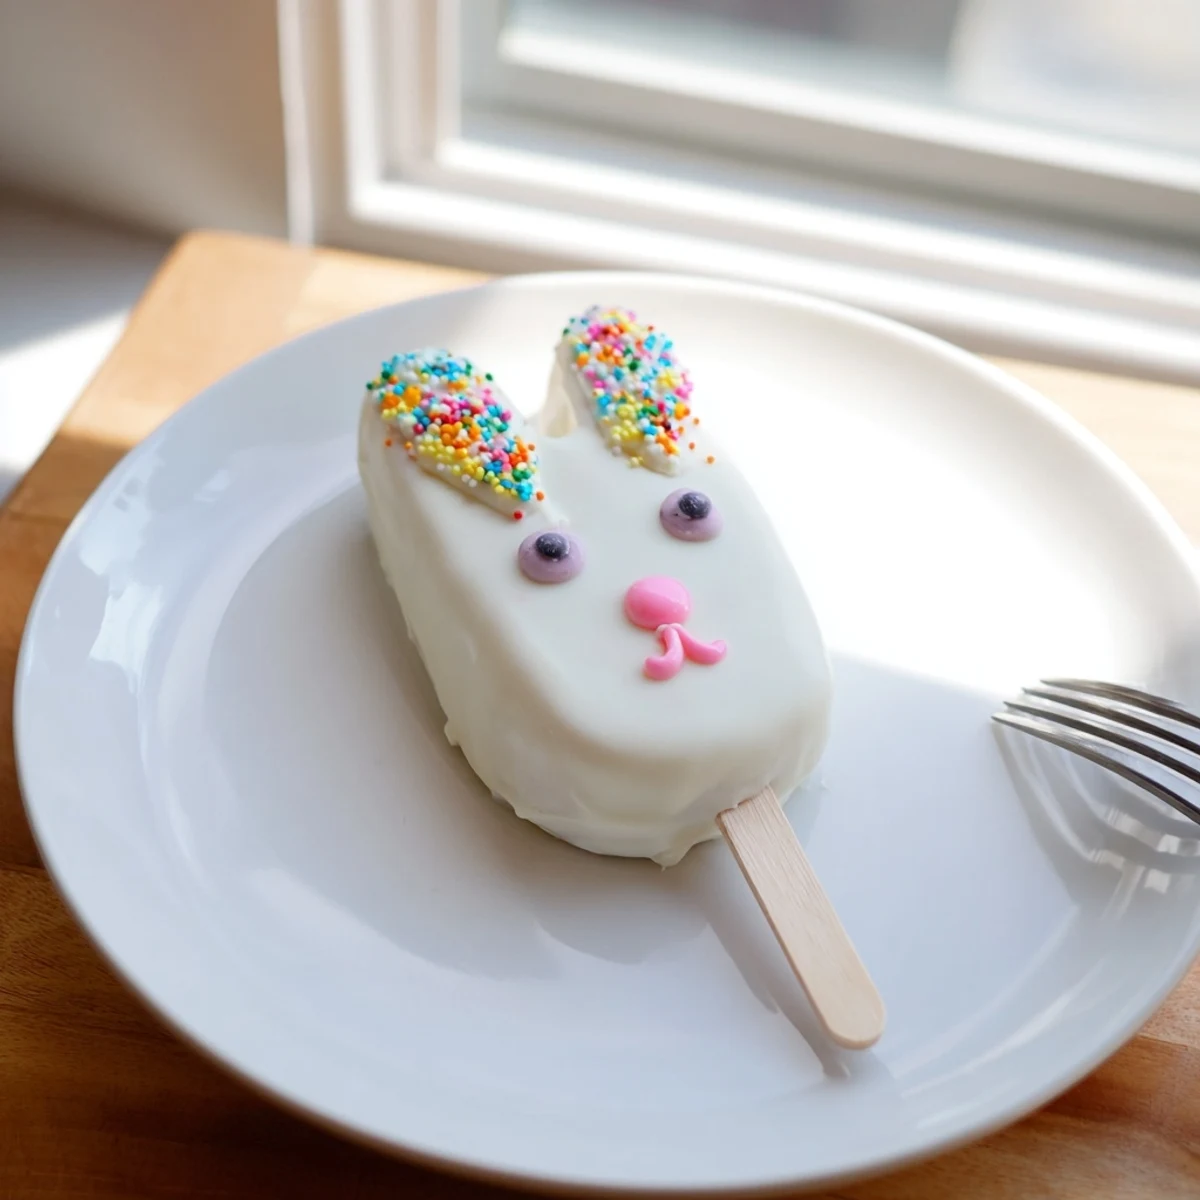
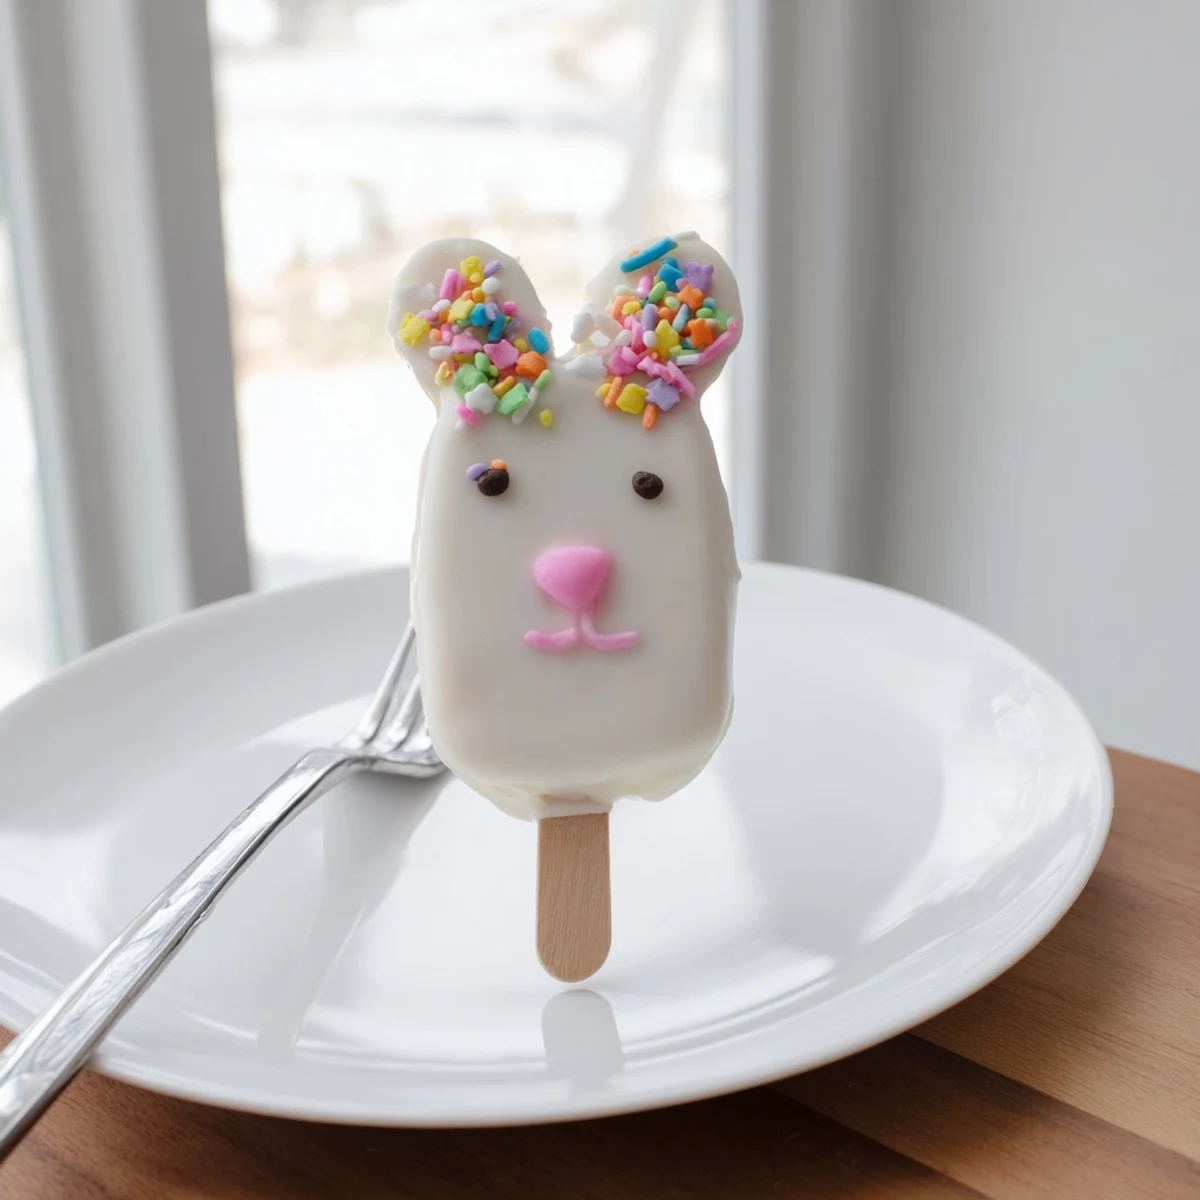
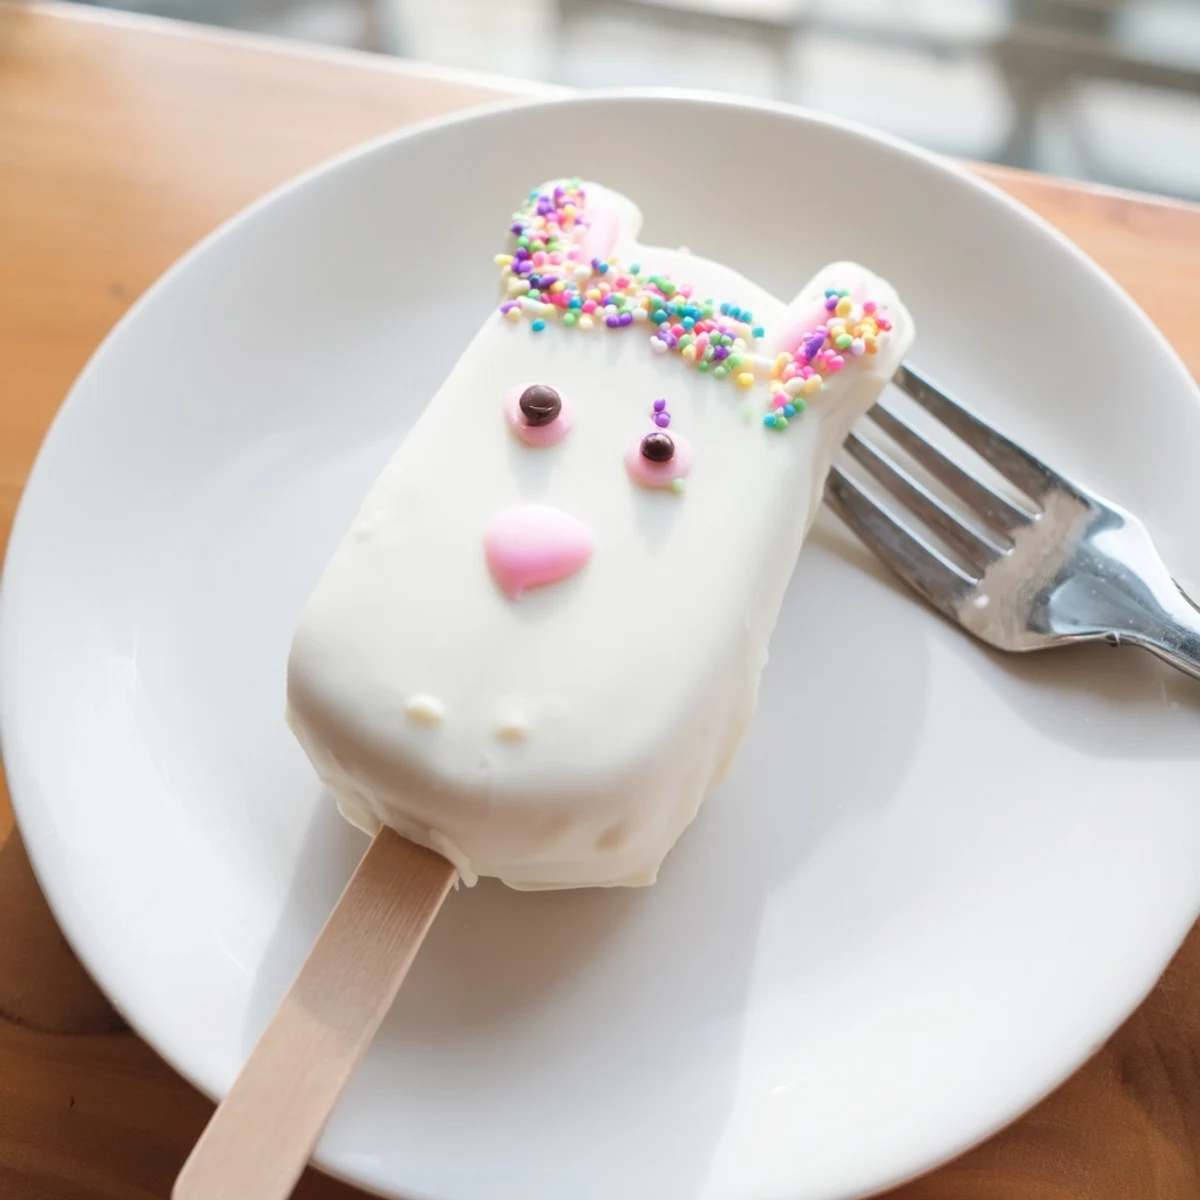
Save These delightful bunny-shaped treats combine moist vanilla cake with a rich white chocolate coating, creating the perfect festive dessert for your Easter celebration. The cake mixture binds together with cream cheese and butter, shaped into adorable bunny faces before being dipped in smooth white chocolate.
What makes these treats special is their customizable nature—you can add candy eyes, fondant ears, and colorful noses to bring each bunny to life. The preparation takes just 25 minutes of active time, followed by a brief chilling period to ensure everything holds together perfectly during dipping.
The result is a charming handheld dessert that looks impressive but requires minimal baking expertise. Perfect for spring gatherings, children's parties, or as a creative weekend project, these treats can be stored in the refrigerator for up to three days, making them ideal for advance preparation.
Last Easter, my niece discovered leftover cake in the freezer and decided we needed to make something magical. She pulled up a video of bunny cakesicles on my phone with the determined focus of a tiny scientist. Three hours later, my kitchen looked like a confetti explosion, but those white chocolate bunny faces staring back at us from the counter were absolutely worth every speck of sprinkles on the floor.
I brought a platter to our neighborhood potluck, and honestly, watching adults light up when they spotted the bunny faces was the best part. Someone asked if I could make them for a baby shower in pastel colors, and another friend immediately planned a birthday cake version. These little treats have a way of turning any gathering into something more festive than it would have been.
Ingredients
- 1 cup vanilla cake crumbs: I save cake trimmings and cupcakes in the freezer just for moments like this
- 2 tbsp cream cheese: Room temperature is crucial for that smooth, doughy texture that holds everything together
- 1 tbsp unsalted butter: Adds richness without making the mixture too soft to work with
- 2 tbsp powdered sugar: Just enough sweetness to bind the crumbs without being cloying
- 1/2 tsp vanilla extract: Pure vanilla makes even store-bought cake crumbs taste homemade
- 10 oz white chocolate or melts: Candy melts are easier for beginners, but real white chocolate has superior flavor
- Edible gel food coloring: Gel colors wont seize the chocolate like liquid versions sometimes do
- 8 cakesicle sticks: Dip the very tip of each stick in melted chocolate before inserting for extra security
- Sprinkles and decorations: Have everything sorted into small bowls before you start dipping
Instructions
- Mix the cake dough:
- Combine cake crumbs, cream cheese, butter, powdered sugar, and vanilla until it holds together when squeezed. The texture should feel like playdough, not sticky or crumbly.
- Shape the bunnies:
- Divide into 8 portions and gently flatten each into an oval bunny face, slightly pointed at the top for ears. Work with one portion at a time and keep the rest covered so they dont dry out.
- Add the sticks:
- Dip about 1/2 inch of each stick into melted white chocolate, then insert into the bottom center of each bunny shape. Pop them in the fridge for at least 20 minutes until completely firm.
- Melt the coating:
- Melt white chocolate in 30-second bursts, stirring between each, until silky smooth. Let it cool slightly so its warm but not hot to the touch.
- Dip and decorate:
- Dip each cakesicle straight down into the chocolate, lift gently, tap against the bowl edge to remove excess, then immediately add decorations while wet. Work quickly once the chocolate is melted.
 Save
Save My daughter now requests these for every school event and holiday, just changing the shape and colors. Weve made hearts for Valentines Day, stars for the Fourth of July, and little ghosts for Halloween. The bunny faces remain the most requested though, probably because those ear details make each one feel like its own tiny personality.
Working With Chocolate Temperature
I learned the hard way that overheated white chocolate becomes grainy and unworkable. Now I use a chocolate thermometer and aim for 90 degrees Fahrenheit. The difference in the final coating is remarkable, smooth and glossy instead of streaky and dull.
Making Ahead Like A Pro
You can form and chill the uncoated cake shapes up to 2 days in advance, stored in an airtight container. Just let them sit at room temperature for 10 minutes before dipping to prevent condensation from making the chocolate seize.
Decoration Ideas That Wow
Fondant rolled thin and cut with kitchen shears makes perfect bunny ears that stand up nicely. For a marbled effect, drop tiny dots of pink gel coloring onto melted white chocolate and give it just two gentle swirls with a toothpick.
- Keep a clean skewer handy for repositioning decorations before the chocolate sets
- Work in a cool room since warm humidity can make chocolate sweat and lose its shine
- Set finished cakesicles upright in a styrofoam block to dry without flat spots
 Save
Save These bunny cakesicles have become our signature Easter contribution, and I honestly look forward to that messy, sprinkly afternoon all year. There is something wonderful about turning simple cake scraps into treats that make people smile.
Your Questions Answered
- → Can I make these cakesicles ahead of time?
-
Yes, you can prepare these treats up to three days in advance. Store them in an airtight container in the refrigerator to maintain freshness. The coating may develop slight condensation when chilled, but this doesn't affect the taste or texture.
- → What type of cake works best for the crumb mixture?
-
Vanilla cake is traditional, but you can use any flavor you enjoy. Chocolate, lemon, red velvet, or even carrot cake would work wonderfully. The key is achieving fine crumbs that bind well with the cream cheese mixture.
- → Do I need a special mold for shaping?
-
While a cakesicle mold helps achieve uniform shapes, it's not essential. You can hand-shape the mixture into flattened ovals or bunny faces using your hands. The mold simply makes the process faster and ensures consistency across all pieces.
- → How do I prevent the white chocolate from seizing when melting?
-
Melt your chocolate in short 30-second bursts in the microwave, stirring thoroughly between each interval. Avoid overheating—white chocolate is particularly sensitive to high temperatures. If it does seize, adding a teaspoon of vegetable oil can help restore smoothness.
- → Can I use candy melts instead of real white chocolate?
-
Absolutely! White candy melts are actually preferred for these treats because they're formulated to set firmly and hold their shape well. They're also easier to work with for dipping and tend to have a smoother finish than melted chocolate bars.
- → What decorations work best for the bunny faces?
-
Candy eyes, edible markers, fondant shapes, and sprinkles all work beautifully. For ears, try fondant, modeling chocolate, or even pretzel sticks dipped in colored coating. Pink pearl sprinkles make adorable noses, while edible gel pens let you add whiskers and other details.
